
Assembly BLOG 2020
To go to the latest post click here.
Monday 24th February 2020
Not a good start to the year, I was looking forward to showing my completed car to my Dad, John, when it's finished, but after a short illness he tragically died yesterday morning at the ripe old age of 94. He only stopped driving about a year ago, due to his failing eyesight, and he will be very much missed by his son, daughter in law, three grandchildren and their partners and his great grandchild, not forgetting his many friends and relatives. May he rest in peace.
Monday 6th April 2020
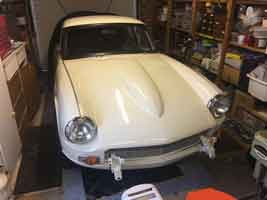
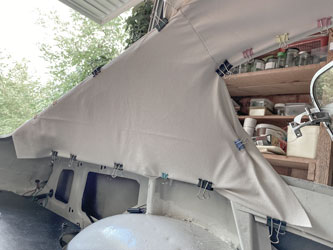
I've uncovered my GT6, and taken out the spares which were stored inside. The cover is still over the rear end, and the heater keeping it warm can be seen in the foreground.
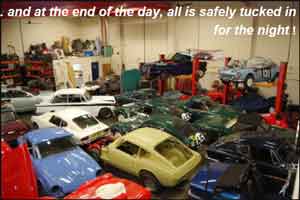
Due to my age (71) I and my wife are self isolating. Unfortunately I have been very busy with Dad's estate - sorting out his photography and dealing with probate, as well as online shopping for my family. However once that's out of the way I should be able to continue with the car during the lockdown! Just found out some very sad news (albeit not CORVID-19 related) that Mark & Jo Field are putting Jigsaw Racing Services into liquidation. Apparently Mark has health issues, I wish him well and hope he is able to continue Triumph related activities. I used his company a couple of times, and he was always extremely helpful. I don't know what is going to happen to his Le Mans Spitfires, hopefully he will be able to keep them. Below is a picture from one of his Newsletters, dated February 2015. Happier days!
Thursday 9th April 2020
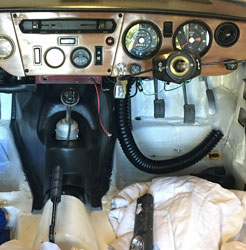
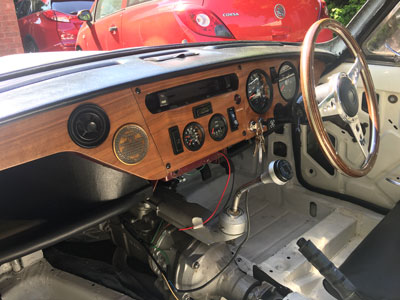
Finally achieved something on the car today! I've fitted the combined oil pressure/temperature gauge and fed the associated oil and water pipes through the bulkhead, they will be connected up later. I've also wired up the gauge lights for the middle two gauges together with their earths. I will check it when its gone dark.
Now it's dark.
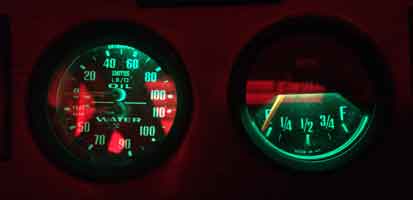
The red is the reflection of the rear lights in the garage doors behind the car! The LED bulbs are green tinted.
Friday 10th April 2020
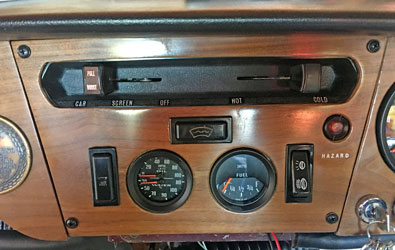
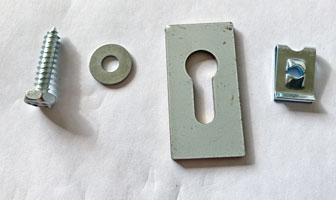
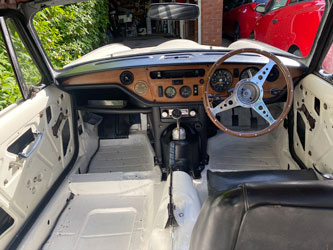
Today I fitted the screws in the centre dashboard fascia.
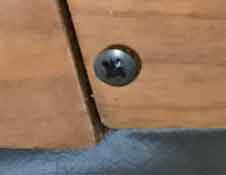
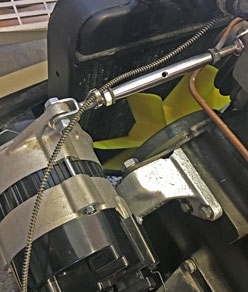
I'm not sure they are the right ones, but they are black and they fit. I also had some cups but these looked too big. Then I fitted, first the capilliary sensor for the temperature gauge. Although I'd spaced up the thermostat cover to make more room for this I still had to slacken it and raise it slightly to get it in, see below.

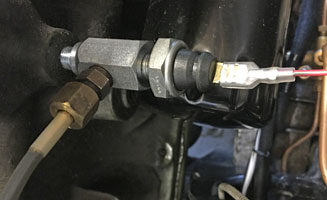
Then I fitted the oil pressure sender to a T piece so both the gauge and the oil pressure warning light work.
Below is the capilliary tube routed around the alternator.
I fitted the grommet in the bulkhead by cutting it with a sharp knife to the centre, fitting it over the pipes, then glueing it back together with superglue - which works really well with rubber. I then pushed it into the hole until the edges engaged.
Saturday 11th April 2020
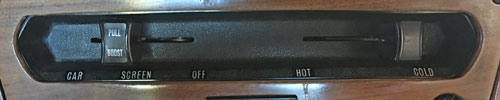
I did not achieve much today. I tried to fit the knobs for the heater controls but I have lost the necessary 1/16" Allen key, so I had to order another one from ebay. The PULL/BOOST sticker was courtesy of ANG Classic Car Parts (I had to destroy the original knob to remove it).
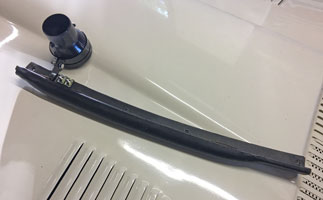
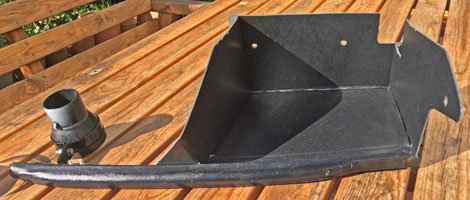
I then found that I still had to fit the ventilation ducting on the driver's side. and assemble the downward facing louvre to the parcel shelf support rail, seen below on the bonnet. I'll continue that tomorrow!
Monday 13th April 2020
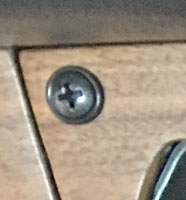
My German friend has emailed me that the corrrect size for the dashboard veneer screws is 4.3mm - this is equivalent to UK gauge No. 8. The original part numbers are 509556 (and 625549 for the cups). Doing a bit more research I find I actually bought these from James Paddocks last May (picture below courtesy of their website)! The original Triumph number 509556 has been superceded by number 517710S. The ones I fitted are plainly wrong, they are panheads and they should be countersunk screws. I found the ones I fitted in one of my bedrooms along with the 'cups' and assumed they went together. This is the trouble with not doing anything for months, one forgets things!
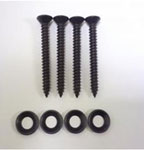
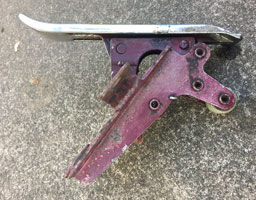
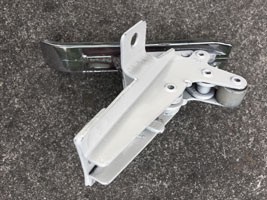
I searched the garage but couldn't find them, so in the end I ordered some black ones from ebay, No.8 x 1" (the ones above look a little long). The rest of the day I worked on the fixings for the bonnet catch plates and cone locating plates I got from Paul Copeland (Stainless for Classics).
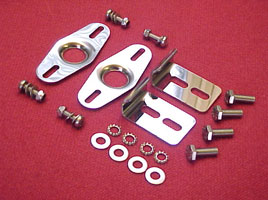
I had fitted the RHS cone locating plate and this had been painted during the respray. I therefore removed it and took off the paint with Nitromors, then cleaned it up to match the unused one which will be fitted to the LHS. I also removed the bonnet catch assemblies to soak in white spirit and clean up. I see that these can still be bought new, albeit for around £60 each.
Tuesday 14th April 2020
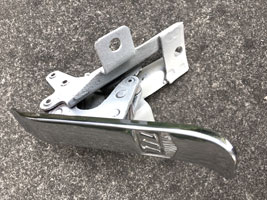
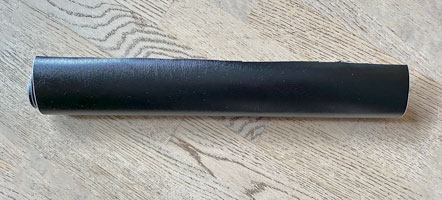
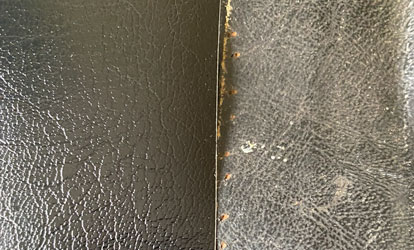
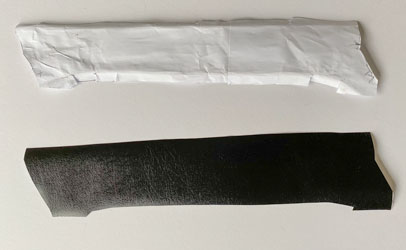
Did more work on the bonnet fastenings. Below is the new stainless steel catch plate and associated stainless setcrews. Between the catch plate and the body is a rectangular washer (613474) which has seen better days. I therefore made new ones out of a piece of thick leather (example, bottom right).
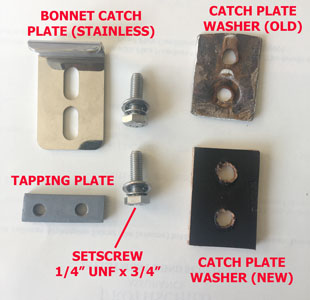
I then cleaned up the tapping plates which go inside the car and painted them with zinc rust-proof undercoat. I also cleaned up the areas where the cone and catch plates will be fitted, and sprayed them with the same zinc primer - ready for white paint tomorrow.
Wednesday 15th April 2020
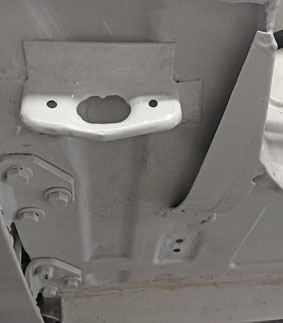
I found a 1/16" allen key, so I was able to tighten up the heater control knobs. I also painted the areas where cone and catch plates will be fitted. I used white hammerite as it is a close match and it is extremely hard and rust-resistant.
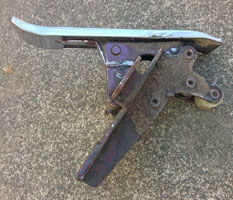
I also cleaned up one of the bonnet catch assemblies and painted it with primer. The original colour (damson) can be seen.
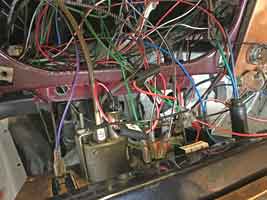
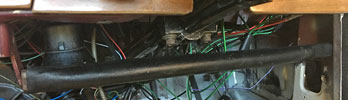
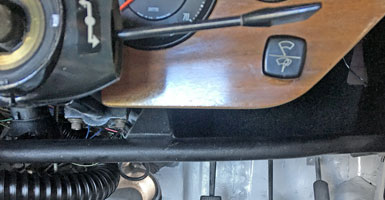
I also fitted the bracket holding the louvre ventilator on the driver's side, as well as the parcel shelf support. Note - the wires which need tidying up!
Thursday 16th April 2020
Today I continued with the bonnet catch assemblies, mainly because I can't face crawling underneath the drivers dashboard area, but also with nothing fitted there it's easler to reach the tapping plates!
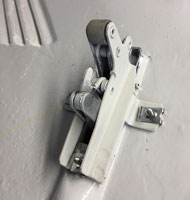
Below, repainted, chrome cleaned and fitted with new stainless fasteners.

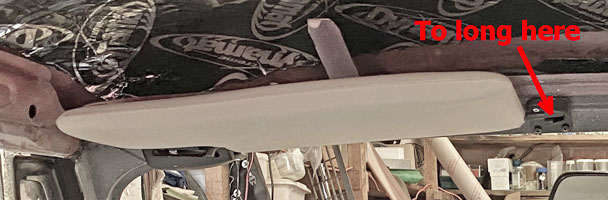
Looming on the horizon is fitting the RH parcel shelf (below) to the small space between the RH parcel bracket and the dashboard, not a big space (see picture at the end of Wednesday's blog).
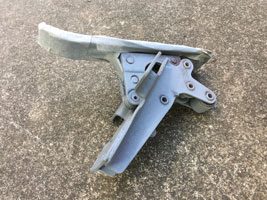
Finally the new bonnet catch plate looks good!
Saturday 18th April 2020
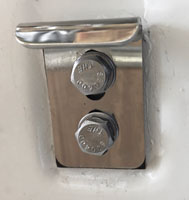
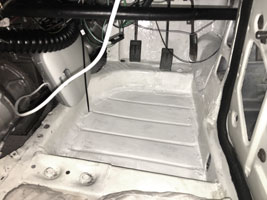
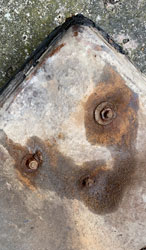
As I was not keen on working under the RH dashboard I set out to make access easier by removing the driver's seat and putting down an old quilt to make the floor more comfortable. I found a "daylight" light which belonged to my Dad and installed that to give good illumination. The result can be seen below:
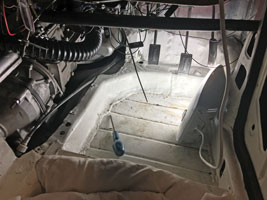
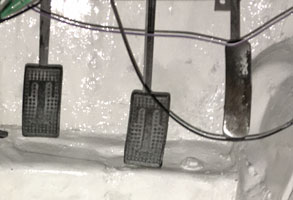
As it looked in need of some paint I cleaned up the area and applied some white Hammerite. It will all eventually be covered in carpet, but I still want it to look acceptable. The pedal rubbers are new (Triumph, not Leyland ones) but the accelerator needs rubbing down and a coat of silver paint.
As it was cold outside today (10 degrees) my feet started to feel cold so I was glad to come in and continue on another day!
Sunday 19th April 2020
First, I painted the accelerator pedal and fitted a rubber grommet in the hole.

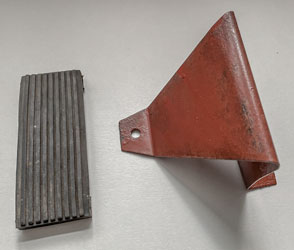
Then in the sunshine I assembled the RH parcel shelf together with the support (with the downward facing louvre vent fitted).
Then, using cable ties, I managed to move most of the wiring under the dashboard away from the location of the parcel shelf. Then, after a great deal of fettling, I managed to fit the parcel shelf! There's not a great deal of room, presumable a good place for the car handbook.
I now need to remove it again to install the ducting for the ventilation!
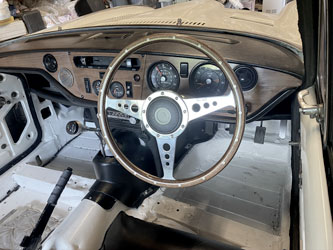
Monday 20th April 2020
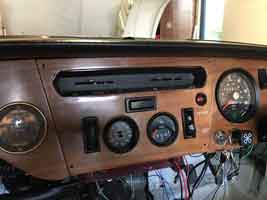
The panel screws for the dashboard arrived this morning, along with other stainless steel fasteners for the bonnet cone plates. Now the dashboard has the correct screws and cups:
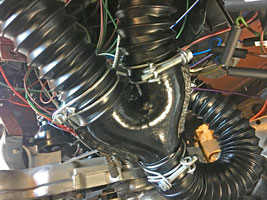
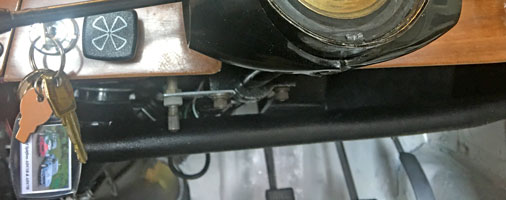
Now for the ducting. On removing the parcel shelf I see that it has pulled some connectors off the wiper/washer switch. I have re-routed these and lengthened one so hopefully it will be better, but I must remember to test everything works before the final screwdown. In fact I had trouble connecting the ducting to the louvre in the dashboard and had to remove this switch so I could see better what I was doing.

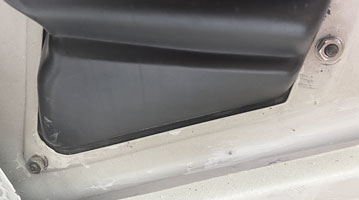
I found a problem with this switch which was re-manufactured by Moss Europe. The contacts were on the bottom, and it would be better for the wiring if these were uppermost. Part protrudes, and this engages with a cutout in the metal plate behind the dashboard so theoretically it will only fit one way. However there is a flat on the plastic thread (see the nut which engages this above right) and this is insufficient to prevent the whole assembly from turning (the original may have been metal). In the end I inserted a small piece of sandpaper on the flat anf hopefully this will keep the assembly in the right position. Below is a trial fitting of the gearbox cover:
And below is the ducting, with only the connection to the downward facing louvre on the glove box support rail to attach.
Tuesday 21st April 2020
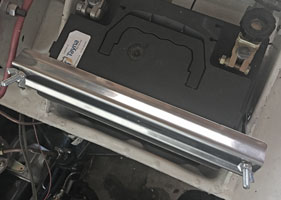
First, I fitted a new stainless steel battery clamp (you guessed, I like a bit of bling) which finally arrived this morning. Also I finally worked out where the speedo trip goes, it attaches to the steering column!
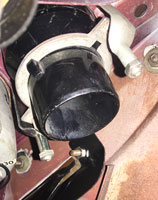
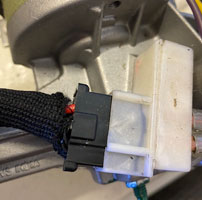
Today I am preoccupied with the TR6 washer/wiper switch. It is still turning when operated. I bought this switch because I wanted a push switch for the electric washer motor, not the crude hand pump originally fitted to the GT6.
![]()
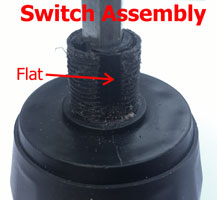
I've sent a message to Moss Europe who re-manufactured this item, as the plastic of the Switch Assembly is too soft and doesn't prevent the Spacer Tune from turning in spite of the similar flat on that. First I tried to glue a small piece of plastic to the plastic flat to engage it better, with Araldite Rapide. However this failed, as after leaving it in the sun for a couple of hours to set, it just 'came off'. Next I cut off a piece of rubber cut from a wine bottle stopper (because it was the correct diameter), and screwed this down between the spacer tube and the switch assembly.
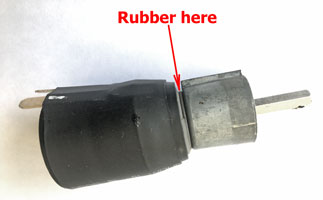
Good news, the rubber worked! I've now connected all the ducting and the parcel shelf is ready to be installed on another day.
Wednesday 22nd April 2020
I had a response to my email to Moss Europe about the Wash/Wipe switch assembly. My email stated "Hi - last July I bought from you 155496 (Switch Assembly, wiper washer). I am having a lot of problems with it and I wonder if you could help. Because the switch is quite stiff, I find that when I switch the wipers on, the whole assembly turns. On dismantling, it seems the problem is the metal spacer tube rotates on the plastic thread, as the flat on the thread is not strong enough to prevent the flat on the metal spacer tube from turning on the plastic thread. I am trying to find a solution but so far have failed!" Adam Chignell (R & D Technical Support Moss Europe Ltd) replied "I have been trying to think of a solution too, but unfortunately I cannot think of one. We do not have any stock at the moment so I can't get one out to see how to improve this". I informed him that I thought I had solved the problem:- "Thanks for replying in these trying times. Actually I think I’ve sorted it. I cut the end off an old rubber wine stopper (it had the i/d I was looking for) and put this between the switch assembly and the spacer tube. On tightening the nut this became a tight fit and so far I can turn the wipers on without the unit turning" and he responded "Brilliant Patrick, great idea".
This afternoon I finally fitted the parcel shelf on the drivers side (RH). It took me a while as I had to spray matt black the self tapping screws and washers fixing it to the back and side. I'm through with working on my back on the floor!
I also had an email from my German friend informing me that he had a similar switch on ebay. On putting the parcel shelf back into position I tested the wipers and washer and they all worked fine (with no 'turning') so I think I'll leave it 'as is' for the moment.
Thursday 23rd April 2020
Fitted the passenger (LH) parcel shelf. I thought it would be straightforward after the RH but it turned out to be far from easy, last time I fitted it the LH louvre vent must not have been in position as it impeded the fitment. In the end I had to cut part of the parcel shelf away, as although there were holes to fit the louvre bracket there was no way this was going to fit in this way! In all it took what seemed hours (probably a couple) and I'm so glad the next job should be a little more pleasant!

Friday 24th April 2020
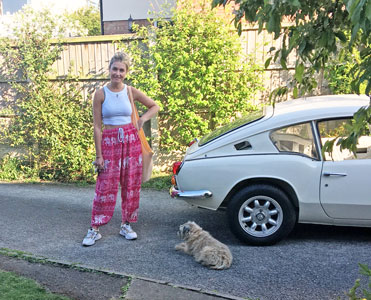
I wasted a lot of time today because I lost the nut holding the steering wheel onto the steering column! In the end I ordered another one from James Paddocks. Still, I still managed to get the car out of the garage for the first time this year.
Below is our daughter Becky who has just delivered some shopping (not forgetting the dog who's also keeping her distance). This is the closest we get to our kids, in these strange times.
The car started as soon as the petrol got to the carburettors. Then it always started on the button, with good oil pressure. However when I drove it back into the garage it 'conked out' and wouldn't restart. Suspecting electrics I checked the distributor and I think the points may have closed up. After a few adjustments the car started, but was a bit rough at first - I wonder if there was a bit of dirt in the fuel! Soon I want to fit the 123 distributor and I want to ensure that it runs well before doing so, then if it doesn't start I know it's not an underlying problem.
Saturday 25th April 2020
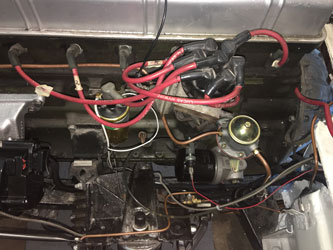
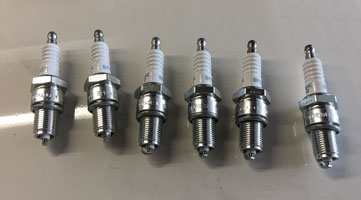
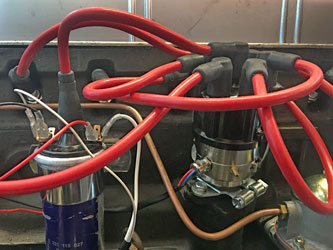
Today I decided to fit the 123/TUNE+ Ignition distributor, together with the new plugs, plug leads and coil which I purchased over a year ago! The main reason is that the engine is not running quite as well as usual, the change was quite abrupt and I therefore suspect electrical rather than fuel problems. Another reason is that I was encouraged by an article in Classic & Sportscar (May 2020) when their Features Editor Greg MacLeman, talking about his Triumph 2500TC (which has the same engine as my car), describes the fitment of the 123/TUNE+. He said he was "staggered at how easy it was to fit - once dropped in, all it needed was to be turned until a green LED lit and the car was purring like a kitten." Below, the scene before any changes.
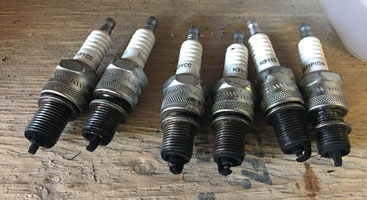
Below left are the old spark plugs (yes, the engine is running rich). Below right are the new plugs (NGK BPR6ES Copper Cored Spark Plugs as recommended by SC Parts) gapped ready to fit (0.025").
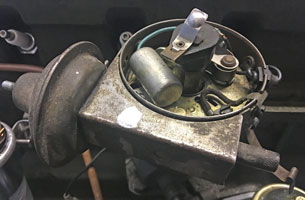
Below (1) the Rotor Arm pointing to the No. 1 cylinder, (2) the old distributor removed, (3) the new distributor in position with a new clamp and (4) the timing marks confirming it is at TDC.
Unfortunately after I "dropped in" the new distributor I realised that the drive-dog wasn't mating. I took it out and put it back in several times without success. Time for a cup of tea, and my daily walk with the dog!
Sunday 26th April 2020
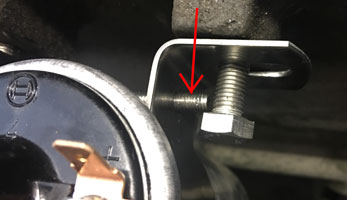
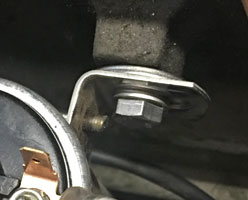
I tried again to fit the 123 distributor and after a couple of tries it just went in! Just shows if something doesn't work the best policy is to walk away and try again on a new day. I then refitted the new Bosch coil, as I wanted to use one of the bolts to connect a blue wire from the distributor which needs to go to earth. This time I had problems as the long screw on the clamp was in the way of the bolt, so I had to grind this off.
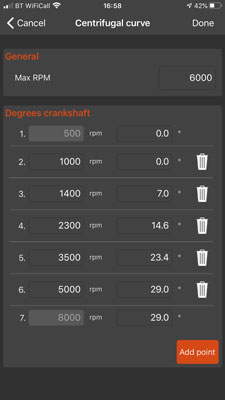
I followed the instructions religiously and then tried to start ther engine. Nothing, not even a misfire. I then reprogrammed according to a Mk3 GT6 thread on a forum as follows:-
| Centrifugal curve | |
| Degrees crankshaft | |
| 1. 500 rpm | 0.0 |
| 2. 1000 rpm | 0.0 |
| 3. 1400 rpm | 7.0 |
| 4. 2300 rpm | 14.6 |
| 5. 3500 rpm | 23.4 |
| 6. 5000 rpm | 29.0 |
| 7. 8000 rpm | 29.0 |
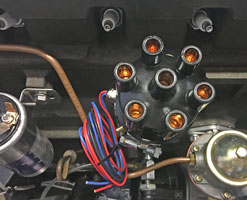
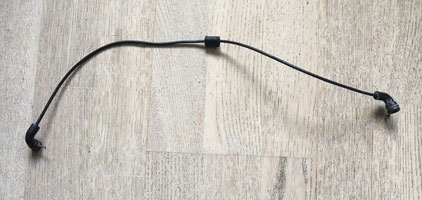
This is done on a app on my mobile phone. The car still didn't start, so I then checked all the wires were connected correctly, which they were. I noticed that the "dashboard" on the 123/TUNE+ app on my moblie phone had a red dot in the bottom LH corner. This should be green, so I reset everything to factory settings (this didn't alter the curve above) and tried again. Result! I'm not sure why, but it was great to hear the engine again. It wouldn't idle, but the vacuum advance tube wouldn't stretch so I'll need a new one. Below are pictures from the app on my phone.

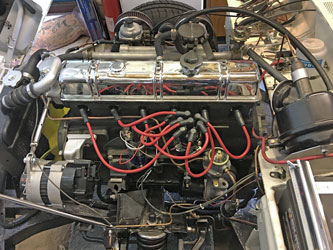
Finally an "after" picture!
Monday 27th April 2020
The vacuum advance tube is not long enough to stretch to the new distributor, so I have ordered a new longer one - it had seen better days in any case.
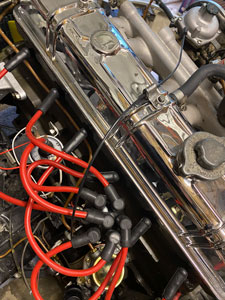
I didn't do very much today, but I did a nice job - fitting the spare rocker cover that I had chromium plated a while ago.
The rest of my time in the garage was spent in sorting my collection of spare parts. In the 1980s when spares were almost worthless I was given quite a few by fellow members of the TSSC (when I attended local meetings). I've got stuff like spare rear quarter windows, a steering column top, starter motor, and the cylinder head from my old 2 litre engine. To add to that is my old rocker cover, Delco distributor etc. I aim to keep all the parts removed from my car which were original to the car, and the others I will eventually sell on ebay. The cylinder head will be sent off to be converted to take unleaded petrol, and possibly modified at the same time.
Wednesday 29th April 2020
The vacuum advance tubing arrived today so, after cleaning up the clip holding it to the central stud of the rocker cover, I fitted it.
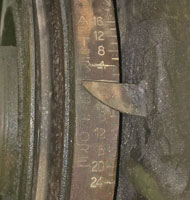
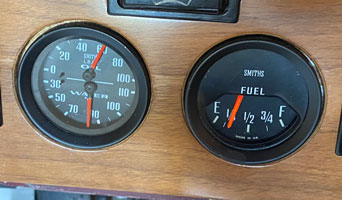
I then tried to start the car. It wouldn't start at all so I checked the usual things. First I removed a spark plug, and there was a spark. Then I disconnected the outlet pipe from the fuel pump and pumped the hand plunger, and petrol came out. Then I disconnected the fuel pipe going into the first carburettor and turned the ignition key. Not only did petrol come out of the tube, but there there was a slight murmer from the engine. I reconnected the pipe and the engine then started. I ran it for around 15 minutes, driving out of the garage and up and down the drive. It seemed to get quite hot, the gauge readings can be seen below:
After running for a while the engine tried to die, and I had to keep my foot on the accelerator to keep it going, so I drove it back into the garage. It then died and seemed reluctant to restart. Then a friend came around (he kept several metres away) and he wanted to hear the engine so I got back into the car and it started right away! I'm not sure what the problem is, but it doesn't seem happy when hot, and also takes a long time to start from cold. I wonder if the carburettors have developed a fault?
Thursday 30th April 2020
Did not do much today. Yesterday when my friend came around I noticed that the headlights didn't work, and neither did the wipers, although the electric washer did. Today I investigated this. I first thought that when fitting the parcel shelves I had disturbed some wires, although in fact I did check afterwards and everything did work. First I ascertained that the headlamp flasher did work, but as that used a separate fuse to the flasher, it pointed to a possible fuse having blown. Checking my circuit diagrams I pinpointed which fuse to check and it had blown. At 20 amps it shouldn't have, but when I was trial fitting the RH parcel shelf I did inadvertently pull apart some bullet connectors - I later re-fastened, tidied and tied them up out of harms way, but it is possible that a live one touched an earth. Hopefully this is what happened (I don't want a repeat later when driving the car) and it won't happen again. The wiper problem turned out to be the plug that goes into the wiper motor coming slightly loose (I had suspected the dashboard switch). I had driven the car aggressively up and down the drive, and the vibration probably loosened this. I should have remembered as it happened when I installed it. I got the connector from Car Builder Solutions and it wasn't great, but it was all I could find on the net. I don't fancy dismantling the wiring again to fit a better one (assuming I could find one) but I'll have to think of a way of making the connection more secure with a cable tie or something!
Saturday 2nd May 2020
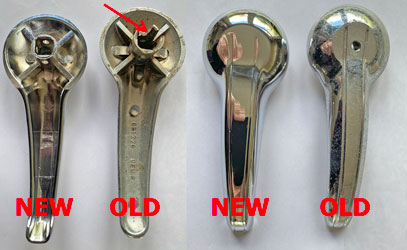
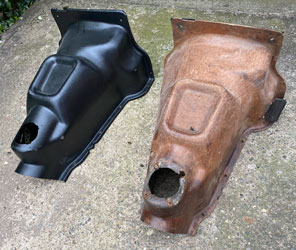
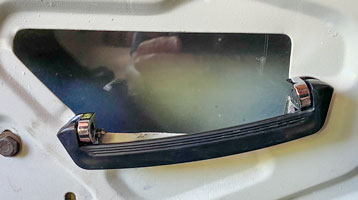
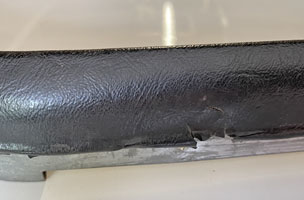
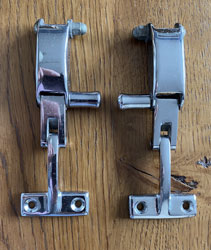
Did some sorting in the garage - looked to see what I had in interior door furniture. The inside door handles were shot so I bought a new pair from James Paddock. As can be seen in the picture below the old one is starting to break up, probably why a non-standard hole had been drilled, so it could be attached with a screw. The replacement handles look very good quality.
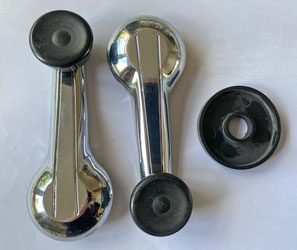
My window winders were good, just needing cleaning with chrome cleaner. The correct part number is even cast inside!

The next problem is the door pulls. I can't find the screws they were fitted with, and also there is nowhere on the door to fix them, I need some nuts to fit into the doors, at present there are only holes!
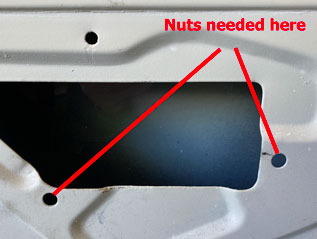
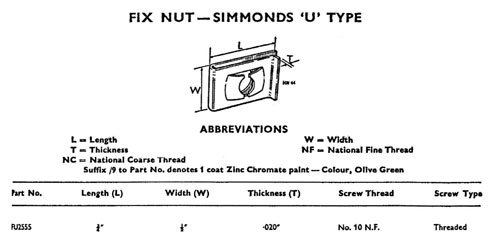
I'm not sure what specification the countersink setscrews are, I suspect they are 3/16" UNF (or No.10 NF or 10-32) by 1/2" or 3/4" - I emailed Paddocks to ask them but haven't had a reply yet. In which case what I need, according to the Standard-Triumph Hardware Catalogue, is a "Fix Nut - Simmonds 'U' Type" in 3/16" (or No.10) UNF which is part number FU2555. 'U' type must refer to the shape!
A Google search brought up Revington TR (many TRs share parts with the GT6) who state that this part has been superceded by RTR5090 which is "1/2" NUT SPIRE U TYPE No10 20mm (0.787") X 13mm". That sounds about right! I have used Revington TR before, as they sometimes stock rare parts that others don't.
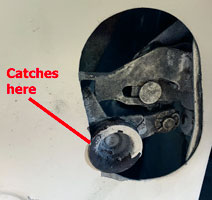
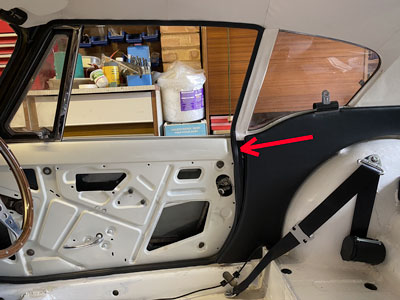
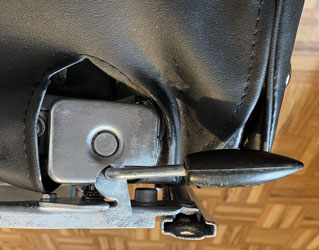
Another problem to solve is the drivers door which wont open from the inside. This is caused by part of the internal mechanism catching in the door frame:
Sunday 3rd May 2020
I sorted the door problem crudely by bending out the door shell in the vicinity with a larg screwdriver!
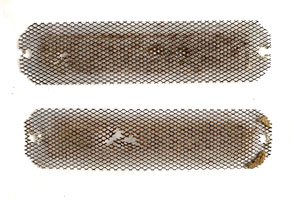
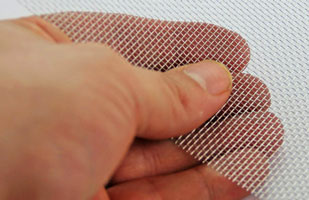
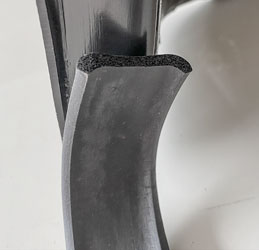
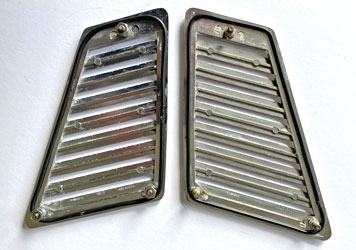
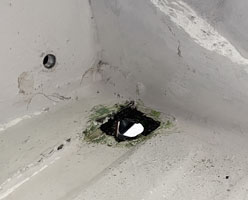
Next, in preparation for fitting the headlining I attended to the rear vents. First, the grill mesh (see below left) is not good, with a hole in one, and both rusty. As these are totally unobtainable I ordered some mesh from the The Mesh Company (Warrington). This cost the huge sum of £3.39 including postage, I hope it arrives and they're not shut due to coronavirus. In the picture (below right) it is not exactly the same but the weave is a similar size.
I then cleaned the grill surrounds and their chrome csk screws. Still scratched, but I'm sure it will be okay.
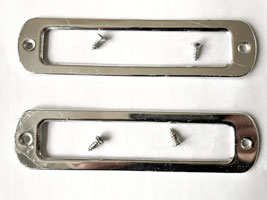
Below is the inside of the outside ventilation grill with new nuts, ready to fit.
The door locks are solid, I squirted WD40 into one yesterday, but still solid. I think I'll have to replace these, but I'll remove one first and soak it in WD40 in a jar, to see if that works better. In fact I will have to dismantle the doors in any case as the windows are not aligned properly (when open they are a long way from the door seal) and the internals look a bit corroded and could probably do with cleaning up and painting. Another job to add to the list!
Monday 4th May 2020
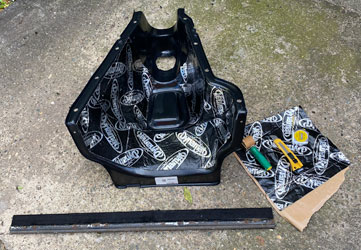
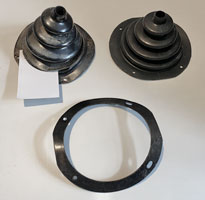
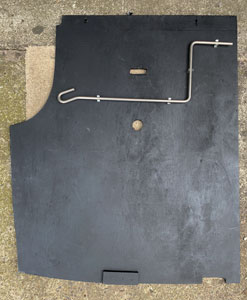
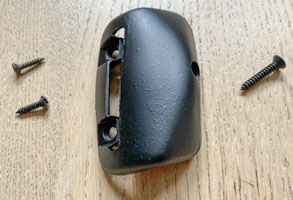
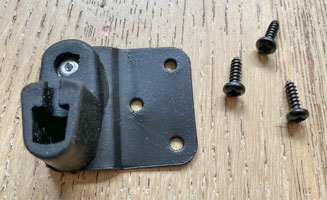
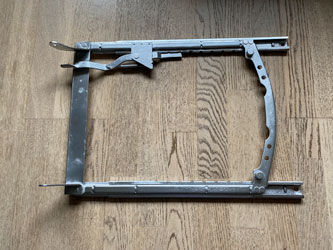
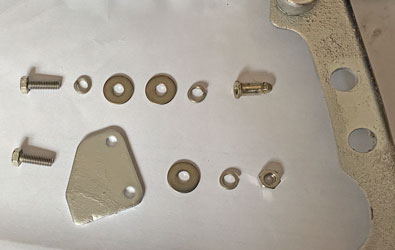
I decided to look at the gearbox cover, having already determined that it fitted (see Monday 20th April). I considered cutting a hole to access the gearbox drain plug, but as it was only 15cm from the bulkhead where the cover curves, that it would not be practical. However I did find that the fitting kit I bought from Rimmer Bros last year did not have enough fasteners (8 sets supplied, 12 needed - 6 each side, see below) so I ordered some more from James Paddock, who are much cheaper and I am sure they source the parts from the same place.
I'm not sure the key plates are necessary for the ones at the bulkhead, but I've ordered more in any case. Before fitting I need to sound/heat proof it, for which I've bought some Dynamat.
Tuesday 5th May 2020
I fitted the Dynamat to the inside of the gearbox cover. The tools I used can be seen below left, a straight edge, a sharp knife, a tape measure and a wallpaper roller!
The old insulation was quite thick and enclosed in a plastic bag, stapled to the sides of the 'cardboard' gearbox cover. As the Dynamat is quite thin in comparison, I think the greater air flow will help to keep the gearbox cool - a previously well known source of heat in the GT6.
Thursday 7th May 2020
I awoke early this morning, and while lying in bed I suddenly remembered that before installing the gearbox cover I need to transfer the footrest from the old one!
The panhead screws and nuts were very rusty and needed to be soaked in WD40. When removed the footrest was itself very rusty and the rubber pad not in the best of condition. However I had a spare gearbox cover, and fortunately the footrest on this was in much better overall condition (seen below left after de-rusting and painting with rust proof primer). Below right I trial fitted it, the tape is to enable me to mark the position of the holes before drilling.
Friday 8th May 2020
Finally fitted the refurbished footrest with new stainless 10-32 (3/16") x 1/2" panhead set screws to the new gearbox cover.
Now, while I await the missing fasteners (dispatched yesterday by James Paddocks), I need to figure out how to apply the seal. Meanwhile I trial fitted some of the gearbox fixings and the bolts for the Console Support Bracket (5/16" x 1" UNF, chrome or stainless steel). These were full of crud and need cleaning out and a 5/16" UNF tap run down to clean the threads.
Saturday 9th May 2020
I'm suffering from a bad back at the moment, so limited myself to fitting the bulkhead seal.
I also looked at the seals provided for the gearbox cover, and assume they fit as below. According to Rimmer Bros. from whom I obtained the fitting kit "the seal required cutting to suit each length edge of the cover and then glue into place". On unpacking the seal I noticed a second smaller seal which presumably is for the gearbox end as the second image below.
Sunday 10th May 2020
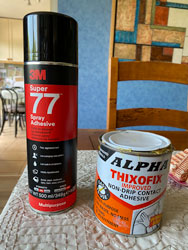
Today, as it was cold, I worked on the kitchen table (with my wife's permission) cutting and glueing the rubber seals onto the gearbox cover. I used (Dunlop) 'Thixofix' which I had bought for upholstery work.
As I could find no guidance or pictures to help me, I hope I have done it correctly!
Monday 11th May 2020
Today I only worked for an hour, preparing the car for the gearbox cover. The 2 holes at the top were not suitable for u-type spire nuts so would need to have nuts and setscrews. I made holes in the rubber seals with a hot soldering iron so that the screws could be easily inserted during fitting. There were 2 holes on each side, and 1 on each side had old nuts and bolts in them which were completely rusty. With great difficulty (and the help of WD40) and having to lie on my back with my head under the dashboard, I managed to remove these. I could do with less of this at my age!
Tuesday 12th May 2020
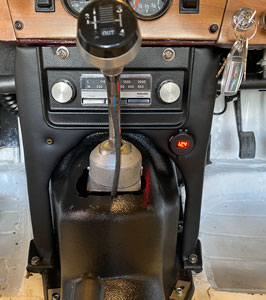
First, I received the new gearlever gaiter, as the old one had split.
The retaining ring I had was clearly the wrong one, as the holes didn't line up at all. I'll have to order a new one.

Finally, I installed the gearbox cover. It was more difficult than I imagined (and I hadn't imagined it would be easy)! First, it was difficult to get it into position, everything under the dashboard seemed to get in the way, particularly the ventilation ducting. Below, it is on its way in.
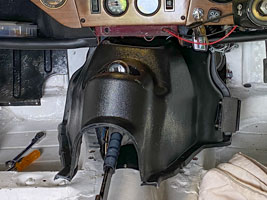
Finally when it was in position it was hard to get the screws in. Although I had pierced thye rubber seal material with a soldering iron, I should have made a much bigger hole as the screws didn't want to go in, pushing the seal downwards, and finally I had to use longer self tapping screws. They didn't line up particularly well, either. I had to spend more time on my back under the dashboard.
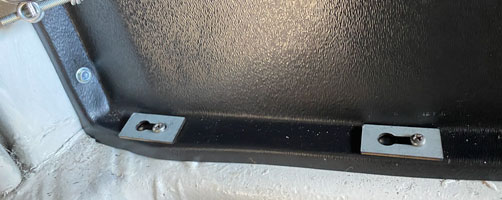
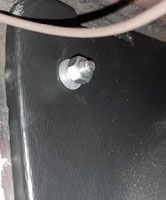
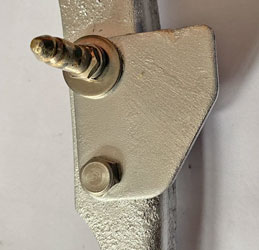
As can be seen above, the screw in the left, going into the bulkhead, didn't need a keyhole plate, as the hole was much smaller than the others. The clamp (just visible in the top left hand corner), is from the duct going to the heater which became dislodged! The upper hole took, as I suspected, a 1/4" screw and bolt (see below).
Wednesday 13th May 2020
Finished fitting the gearbox tunnel/cover. This was one of the worst jobs I've had to do! The first mistake I made was not to cut away the rubber seal in the vicinity of the larger holes along the side. Although I had made a small hole it was a waste of time. Trying to get the screws in was a nightmare, particularly as most of the spire clips were at the edge of the hole. This could have been lessened by not tightening the front/scuttle end which tended to pull the whole cover forward. I would advise leaving these fixings loose and only tightening after the bottom screws were in. Hindsight is a wonderful thing. With some difficulty I also managed to get the ducting re-attached to the bottom of the heater. My hands are so sore from catching them on sharp objects I'll have a day off working on the car.
I also trial fitted the centre console support, it was a very tight fit - I suspect that the new gearbox cover is thicker, I'll have to sand the top edge of the console support, and it still awaits recovering with foam and new black pvc (I've got a recovering kit). I'm worried that the normal 5/16" bolts won't be long enough - I've emailed James Paddocks to ask how long the chrome screws they sell in their console support fitting kit are.
Friday 15th May 2020
Had a response from J. Paddock, their bolts "624818 are 1" long". I'm pretty sure this is too short, but checking with the console support in place (less covering), the total depth to the end of the hole is 1 3/8", so a bolt or setscrew 1 1/4" long would be preferable.
I cut the new gauze for the rear inner vents. It's not exactly the same as the old, but I think it looks okay!
Then I made a rubber seal for the rear outer vents with 3mm 'O' ring material and superglue.
Saturday 16th May 2020
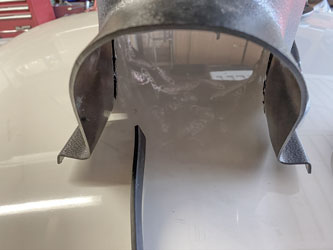
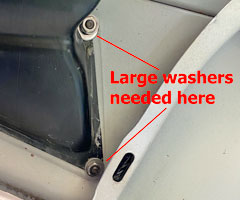
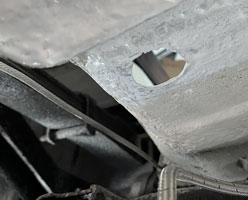
I fitted the rear vents. Like all the jobs I'm doing at the present, it wasn't easy! The problem was that the plastic air extractor ducts (part no. 908161&2) had a hole at one end but the other end had 2 'openings' to which a normal nut/washer would not take a hold!
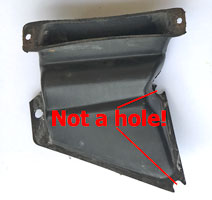
I had to use an oversize washer on these, and the 10-32 nuts kept falling into the recesses of the rear of the car!
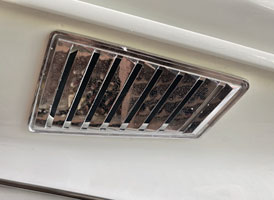
Here is the vent from the outside.
Sunday 17th May 2020
As I lay in bed this morning, I realized that I'd put the extractor ducts on wrongly, hence the lack of holes! I removed them and they fitted under the metal grills on the outside of the car. This morning I removed them and refitted them correctly!! I considered removing the above post but in the end decided to leave it. As they say, "we all make mistakes", the real mistake was not to photograph it before disassembling it so I had a point of reference.
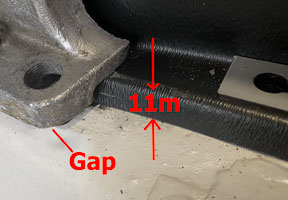
Next, I have a problem with the console support and the new gearbox cover. This is around 11mm thick at the bottom and therefore as the foot is made for the original cover which is 6mm thick in the same place, the foot does not reach the floor, there is a gap.
This means that the unit is a tight fit, and the 2 holes at the top (which are also to hold the radio plate) don't line up and the 1/4" screws will not go in.
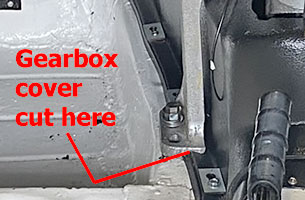
I solved the problem of the console support, with my Dremel I cut the new gearbox cover either side of the feet (see below) and also along the side where I removed the part under the horizontal cut:
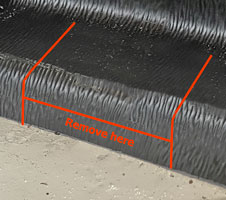
This did the trick, the console support now fits properly (I didn't have the correct bolts, hence the 'heath robinson' arrangement). I now need to fit the lower LH padding assembly (812981) and recover the aluminium console support with new vinyl.
Tuesday 19th May 2020
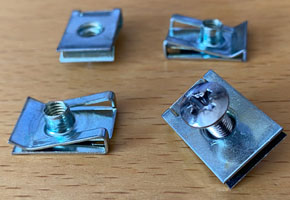
I didn't do much yesterday except fire a couple of emails to Any Cook of the TSSC and my GT6 friend in Germany, asking about the fixings for the door pull to the door. Mine look as follows, and next a similar picture from Germany showing welded in or crimped nuts where I have only holes!

There are two solutions to this conundrum, either replicate the blue door by rivetting in rivet nuts (using the tool below), as the original, or using threaded M5 U shaped spire nuts wich at 32 threads per inch are almost identical to 10-32 (3/16 or 4.8mm) and therefore will hopefully take the original chromed screws.
In the end I ordered some M5 spire nuts from ebay, as recommended by Andy Cook, to try.
It seems that Andy has also obtained a ABS plastic gearbox cover/tunnel for his GT6 so hopefully my recommendations will help him to avoid the pitfalls into which I fell!
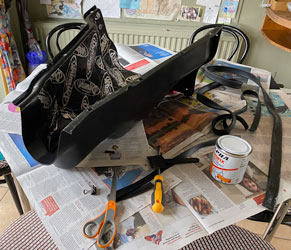
Later I made a start on recovering the console support. I'm no upholsterer, my wife thinks nobody will notice the inperfections! I'm not sure..
Wednesday 20th May 2020
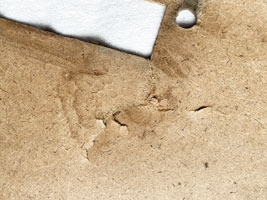
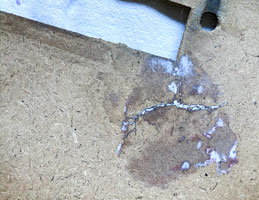
I repaired damage to one of the Trim boards, (QTR Trim headlining) yesterday by applying lots of PVA glue and clamping in a vice between two pieces of wood (and lots of newspaper to prevent sticking to the wood). Today I removed it from the vice and sanded away the newspaper, and I'm quite pleased with the result - the surface is now smooth.
Today, I also received the M5 U shaped Spire nuts, and the 10-32 screws to attach the door pulls fit perfectly as I'd hoped. I just need to try them in the doors.
Voila!
The console support is now (inperfectly) finished.
After 24 hours for the glue to set, I need to make the holes?
Thursday 21st May 2020
I made the holes in the console support, very carefully, with a sharp knife, after trying a drill on a scrap piece of vinyl - with disastrous results! Here is the final item:
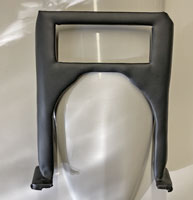
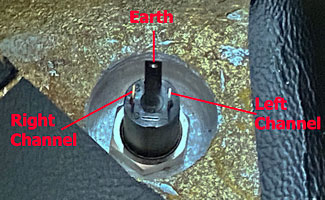
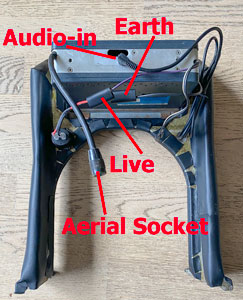
The small hole on the LHS is a 3.5mm socket for a headphone jack (it can be connected to an ipod or mobile phone) and on the right is a dual USB socket to charge a mobile phone etc, and also a digital voltmeter. I've had to order an aerial lead to join the back of the radio to the aerial at the back of the car. I've also ordered a connector as 1960s speaker connectors now seem unobtainable. The radio used to be fitted to my 1969 Mini Cooper, I removed it when I sold the car in 1977, so it is bang in period. It is the cheaper model Radiomobile, as at the time I couldn't afford the more expensive push button model. The back of the audio socket needs to be wire as follows:
Friday 22nd May 2020
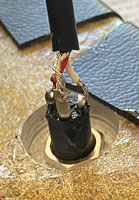
I prepared the radio/USB/audio-in connections in preparation to fitting into the car. First I soldered the audio-in wire to the back of the 3.5mm socket mounted, then shrink-wrapped it all.
Then I prepared the othe wires & connectors. On the left, and unlabled, is the back of the USB socket for connecting my mobile phone or satnav. Totally unoriginal, but easily reverted if required. The radio was modified by my friend Steve Harris of "On The Air" Vintage Radio fame. Hopefully it can play music from my ipod or mobile phone.
Saturday 23rd May 2020
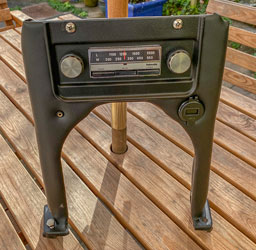
Finally fitted the radio console, and it all works! The little light in the centre of the USB port is a digital voltmeter (it reads 12.4 volts) - how cool is that!
Not without problems, though. First, it wouldn't go in with the 'Crash Pad/Lower' 812981 in place, so I had to remove it, although I'm not sure how to fit it with the console in position. Also, the crash pad was damaged, and it showed (see below). Second. I had to remove the central section of the dashboard to reach the 1/4" UNF panhead setscrews to get the nuts on, but this is now a 5 minute job, although usually some connections manage to get undone! Third, I had trouble getting the rear 5/16" setcrews in at the bottom, but I didn't persevere in case I need to remove it again.
I may have to order a new crash pad one from Rimmers (they are the only supplier with one in stock) but I'll experiment with the old one, as I may have to remove some metal to get it to fit and new ones are expensive (£67 + vat).
Sunday 24th May 2020
Not a bad day! I managed to fit the crash pad by removing material from the RHS of it, as below.
Monday 25th May 2020
I put a the picture (above right) on Instagram, and somebody pointed out that my restoration was very fast, as the speedometer read 52 mph! I never even noticed, but a sharp tap on the glass brought the needle back to zero. Why it was up there on the first place I don't know, I'll have to watch it next time I get the car going.
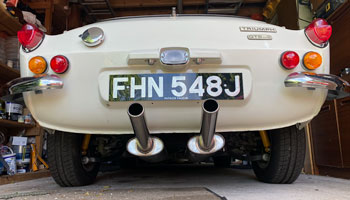
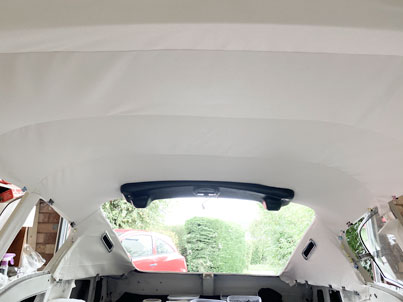
A rear view of my car:
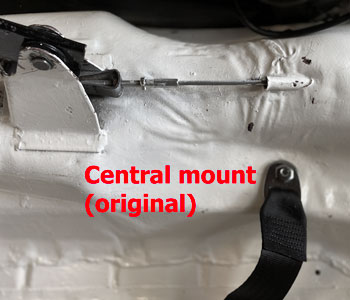
I need to start thinking about fitting the headlining, but instead I got out the seat belts, and tried to work out how they fit!
Tuesday 26th May 2020
The seat belts were made specially for me by QUICKFIT SAFETY BELT SERVICES of Stanmore, Middlesex, and are a good copy of the Britax belts commonly fitted in the 1960s - I even obtained a Britax sticker from ebay!
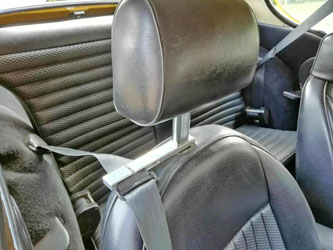
First, I needed to identify the anchorage points. This was helped by a picture of the GT6 Mk3 (which is the same inside as the Mk2) kindly sent to me by Andy Cook of the TSSC (see below). The belts goes over the seat, and I have purchased the useful aluminium guide fitted to the headrest of the seat (I will be fitting similar seats).
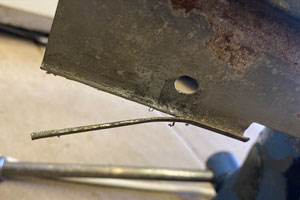
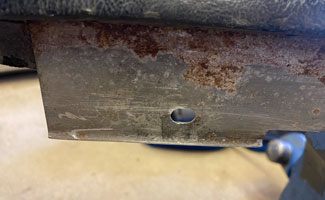
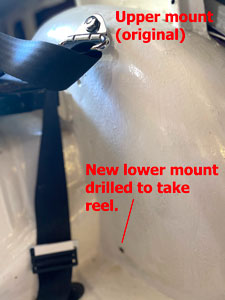
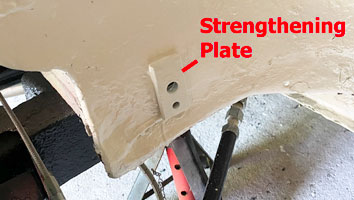
Three remain from the static belts fitted originally: the first is on the rear wheel arch, the second is on the floor near the mounting points for the rear tie bar, and the third is on the central tunnel just behind the handbrake. These are existing points, so don’t need any additional reinforcement, however they were very dirty and needed a 7/16” UNF tap running down them. As the new belts are inertial reel, a new mounting point needs to be created to hold the reel itself, on the lower part of the rear wheel arch. This needs reinforcement, plates for which were provided by Quickfits. For this I drilled an 11mm hole, and glued the reinforcement plate to the outside of the wheel arch with araldite, not to provide any additional strength, but to hold the plate in position until the belt reel is fitted. When the glue is set, I will paint the outer area in white so that it is inconspicuous.
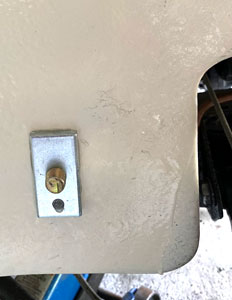

Wednesday 27th May 2020
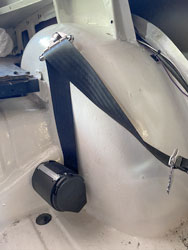
I fitted the reel for the passenger seat belt, and drilled a hole for the drivers side strengthening plate which I glued in place.
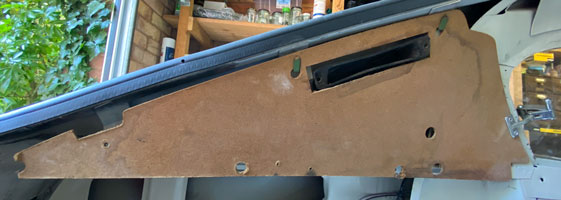
I ordered the clips to fix the rear quarter trim boards from Woolies, as well as some foam for the rear support rail finisher (I can't find this as a separate part, although detachable it seems to be part of the support rail assembly). This needs refurbishment and recovering in black leathercloth.
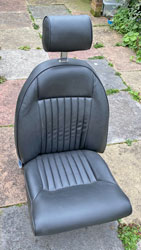
I also got out the seat runners and soaked them in WD40 to free off the sliding mechanism. These are slightly different from the standard items as I will be fitting later seats from a Spitfire 1500 (Luxury Pack Reclining Seats & Headrests).
They will, of course, be cleaned up and painted! I also ordered 96 small foldback metal paper clips, as these have been recommended as the best way to hold the headlining in place (that's a job I'm not looking forward to). I was pleased to receive an email from a David Burden, who also owns a Mk2 GT6 (with a Mk3 bonnet) which looks superb in its blue colour. Not unlike myself, he similarly loves lying on his back with his head under the dashboard!!
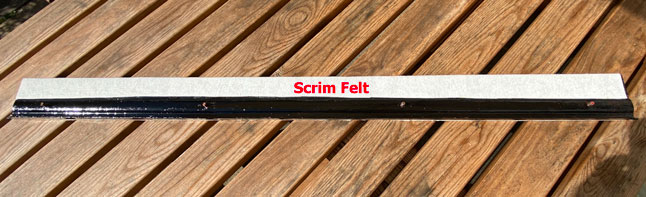
Saturday 30th May 2020
Yesterday I stripped the felt from the rear support rail finisher and repainted it. Today I received the 3mm thick scrim foam from Woolies (a leading supplier of upholstery materials for classic cars) which I used to replace the felt.. I already have a large roll of black pvc leathercloth (from my craft business which I had until 2004), with which I will replace the previous covering.
Below - my roll of leathercloth.

Below - contact adhesive appled.
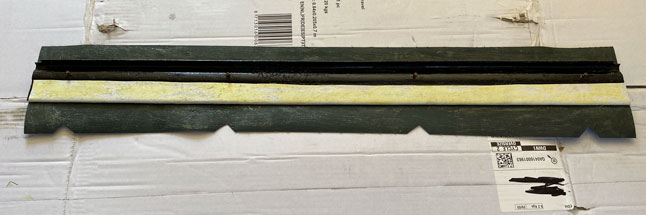
An now the finished product:
Sunday 31st May 2020
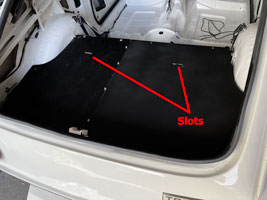
I made a slot in the new RH board for the rear of the car, and painted it black (the board, not the slot!). These are for cargo straps.

Monday 1st June 2020
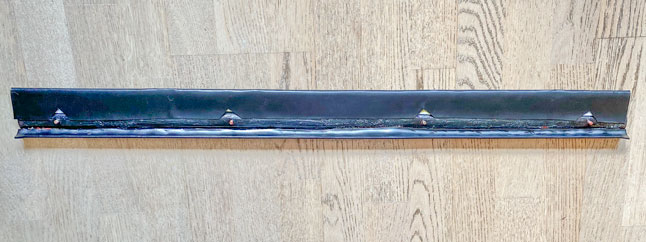
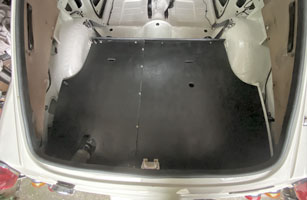
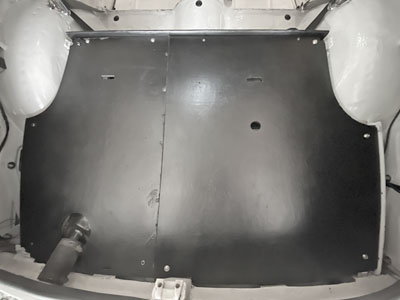
Today I spent quite a lot of time fitting the support rail and the rear boards. First, the support rail wouldn't fit over the rear wheel arch lugs with the newly recovered finisher assembled, and the 10-32 nuts were so inaccessible that there was no way they could be attached in situ. In the end I had to grind a little off the o/s lug to get the support rail assembly into position. I'm assuming that as a new n/s rear wheel arch had to be fitted, that something was slightly out of alignment. Here is the result.

Below is the rear of the car.
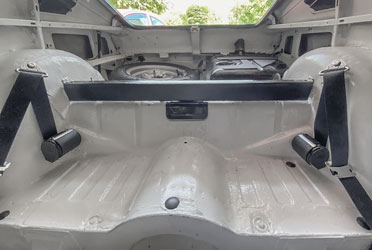
The new inertia reel seat belts can be seen, also. The rear boards are not yet in position, so the spare tyre and fuel tank are visible.
I also drilled a 30mm hole in the new board, presumably to get a purchase on it when lifting it up. As I wasn't happy with the matt black finish, I've ordered some satin black paint with which I'll repaint both boards to match.
Tuesday 2nd June 2020
Looking at the picture of the inside rear of the car I realised that there was no grommet under the RHS seat belt reel, wheras there was one on the LHS!
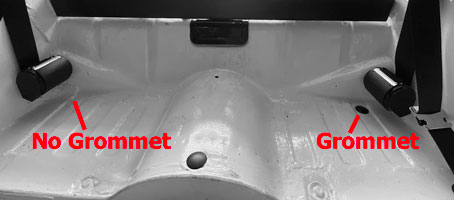
After some digging I found the hole, the grommet had been painted over. On extraction the hole was a little rusty, so I sanded and applied some rust killer.
I then fitted the rear trim boards. I was a little puzzled as Canley Classics says that you need 4 trim clips and 2 side clips, which I assumed was for each board, but I then realised that this was for both sides.
I'm still not clear where the side clip goes!
Wednesday 3rd June 2020
1" Grommet now in place, and the rear boards repainted.

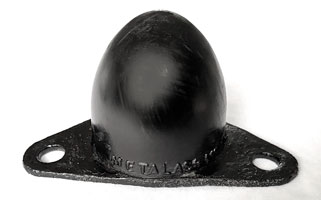
While I had the RH rear wheel off, I cleaned up the bump stop, which turned out to be a genuine Metalastik one!
Thursday 4th June 2020
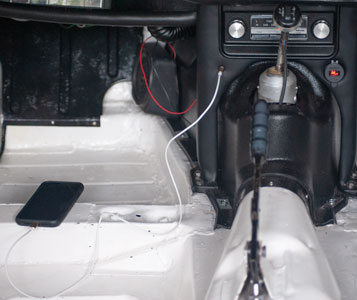
I received the lightning to audio connector today, and Bingo, I can listen to music on my iPhone, on the car radio. The speaker is temporary, I'm looking for a more compact mono speaker I can mount under the parcel shelf.
Friday 5th June 2020
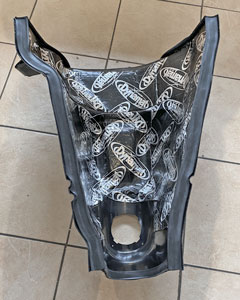
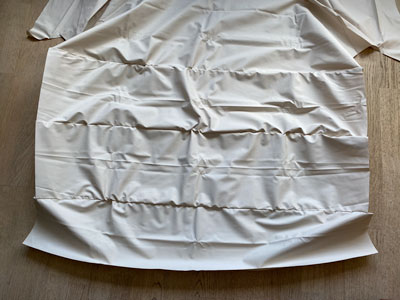
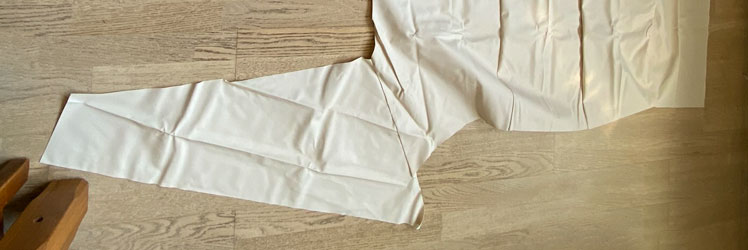
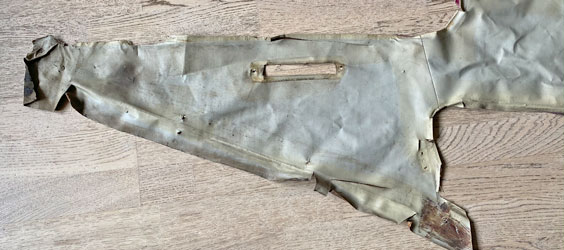
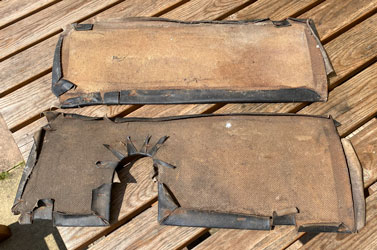
I retrieved the old headlining from the garage and laid it out in the dining room! Then I did the same with the new.
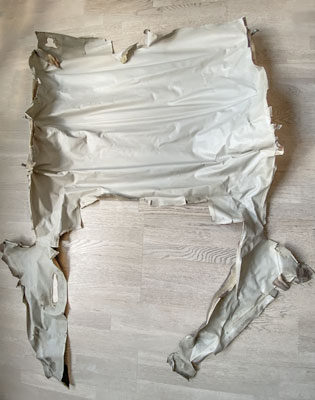
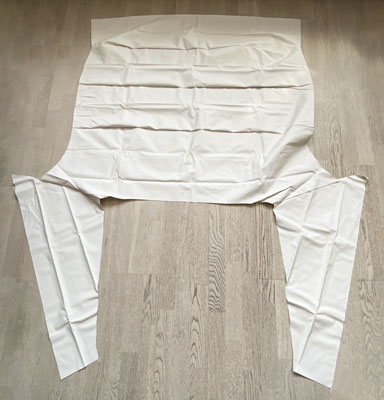
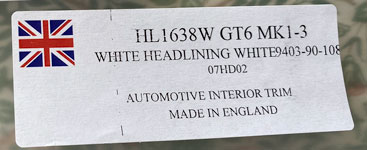
You can see why it needs replacing! Although supplied by James Paddocks it is in fact made by Newton Commercial, and you can see the NC product number HL1638W.

Then I removed the listing rails from the old lining. These are colour coded, green at front, then white, then brown at the rear. On close examination the colours are just visible!
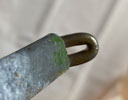
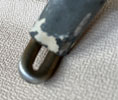
The rails didn't want to come out, due to light corrosion, so they had to be cut out. They were lightly sanded before attempting to fit them into the new lining. They were quite difficult to feed through, and made an unpleasant noise as if they would cut through my nice new headlining! Also, they seemed a little short, and I had to ruck up the lining to get them to protrude at the other end!
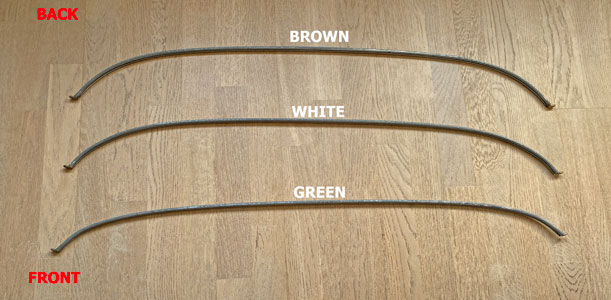
Here they are installed in the new headlining.
The material is not exactly the same, but is close to the original (which has gone brown over the last 50 years).

The next job is to fit Dynamat to the roof, prior to trial fitting of the headlining.
Sunday 7th June 2020

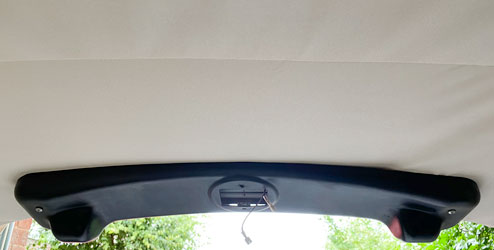
Just visible are the 3 holes either side to take the ends of the listing rails of the headlining.

Monday 8th June 2020
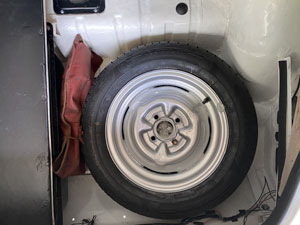
Today I attended to details. First I fitted the jack handle underneath the rear board with terry clips, attached with small self tappers. It's not the original but a stainless steel one I purchased from ebay. The one I had with the car is too long, so I suspect is not original either.
Below is a view of the spare wheel. It's upside down, but for some reason will not fit the other way up, several rear panels have been replaced probably changing the dimensions of the wheel well, The nuts are standard ones, as the nuts securing the GB wheels are special to these, and the spare is the original steel. The nuts are kept in a yoghurt carton in the centre of the wheel (I sprayed it silver to disguise it). To the left of the wheel is the original jack in its original bag.
Below are the rear boards. I've fitted new press studs to the right board to match the original ones on the left, original, board.
Wednesday 10th June 2020
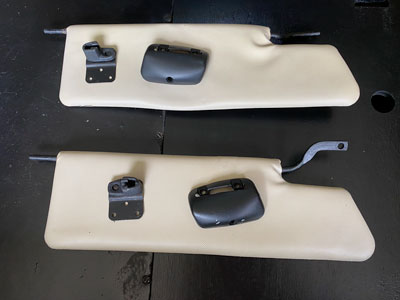
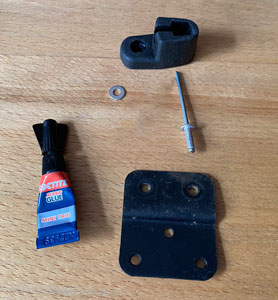
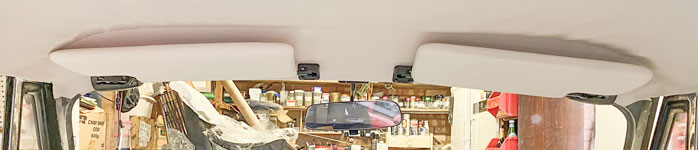
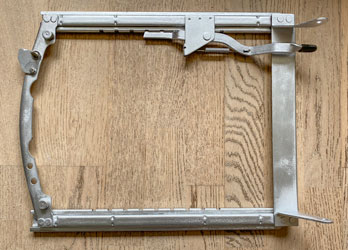
I was hoping to assemble my refurbished sun visors in situ prior to test fitting the headlining, but found that I needed fasteners which I duly ordered from Rimmers (James Paddock did not have all ther parts I needed). I considered that the trial fitting may turn to a full fitting, as it may be difficult to remove the listing rails once fitted, so I wanted everything to be okay for the sun visors and mirror which would have to be screwed into place through the new headlining.
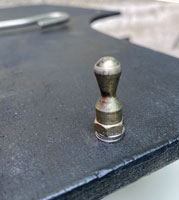
While waiting for these parts I decided to do a small modification to the rear spare wheel board which needs to be lifted to access the spare wheel, etc. The problem is that the spire studs (618432) are quite tight as I never used them since buying the car in 1980!
The board was just loose and was not fixed as it was originally. Now that I have started using these, it's a little difficult lifting the board with only the holes on which to get a purchase. I therefore fitted a handle made from an old camera strap. I chiselled a small cut-out on the end of the board, to stop the strap from fouling the edge of the support rail, and glued it in place with contact adhesive.
It is now really easy to lift the board to access the spare wheel, and the handle normally lies flat so it will not get in the way of the carpet, when fitted.
Thursday 11th June 2020
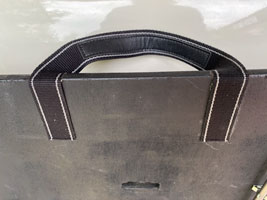
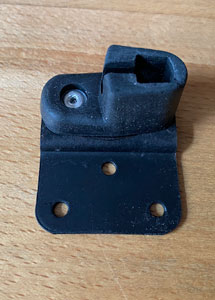
I received the fasteners I ordered from Rimmers in double quick time! However they presented some problems. First I ordered some new rubber retainers as the originals had gone hard, and one was showing a split. The replacements were a little different in that they were just the rubbers, unlike mine which are mounted on metal, as below (right). Also they were supposed to be fixed by self tapping screws, which if employed would probably cut into the headlining and wouldn't fit into the original holes. I decided to remove the original rubbers and replace them with the new ones. Strangely the GT6 parts manual also shows just the rubber!


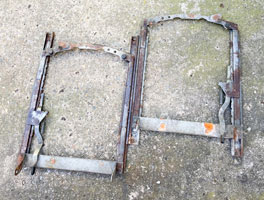
Below is part of an illustration from John Thomason's excellent book "Triumph Spitfire and GT6: A Guide to Originality" which at least matches my car.
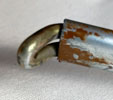
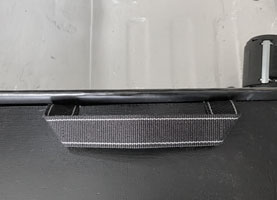
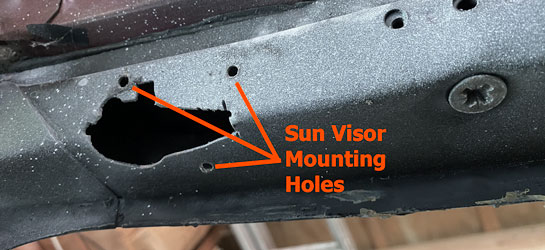
They therefore need to be attached to the metal substrate (as above) , so I removed the old ones by drilling out the rivet. I then glued the new ones on with Cyanoacrylate Adhesive (recommended for metal to rubber bonds) and also secure them on one side (the riveter wouldn't fit in the higher part) with a pop rivet and a small washer. This seemed to work quite well, hopefully they won't come apart when screwed into place - the three holes in the windscreen frame can be seen below. I had to find 6 suitable self tapping screws and spray them matt black.
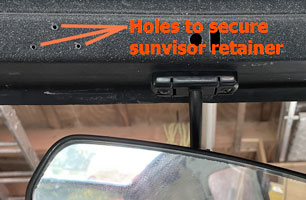
My windscreen frame is not original to the car, this was badly corroded. The present one was a gift from John Kipping, back in the early 1980s and came from a Spitfire. However I found that the holes for the sun visors and mirror were identical, there were just some additional ones for the clips to secure the soft top. Below are my refurbished items, before and after assembly.
The holes for the sun visors look like this:
The holes top right were for the soft top clips of the Spitfire. Finally, below, items ready for trial fitting.
Saturday 13th June 2020
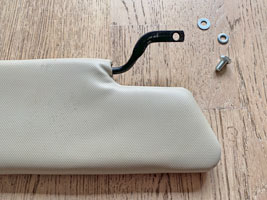
I've been busy with other things, so today I only trial fitted the sun visors. There was a little problem with the passenger side in that the 2 upper screws supplied were too small for the existing holes, and also, strangely, the inner bar was too long to fit properly in the rubber retainer!
Here is both, and the mirror in position. The screws were substituted by larger ones (sprayed black) but the inner bar may need to be cut down by a few millimetres. I'm not sure why this has happened as, to my knowledge, nothing has been moved or disturbed in this area.

I now need to remove the sun visors and mirror, prior to fitting the headlining. I will try to devise some kind of aid to help me locate the mounting holes which will need to be located with the headlining in position!
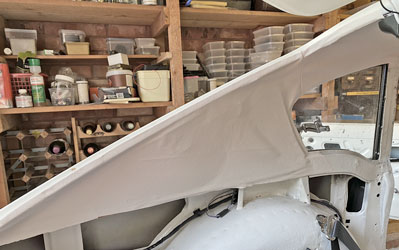
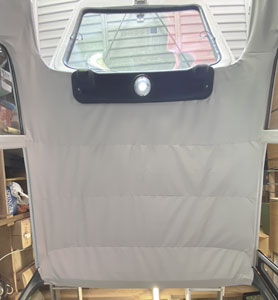
Monday 15th June 2020
Today I finally bit the bullet and started fitting the new headlining! First, I had to remove the rear interior light and rear tailgate hinge cover. I put the screws on the rear floor and 2 promptly rolled into one of the holes for the straps, and disappeared under the fuel tank, never to be found again. Fortunately I found 2 more 10-32 panhead bolts and to prevent a reoccurrence I taped over all the holes.
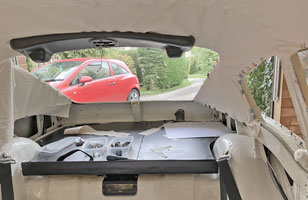
Before taking the headlining out to the car I first marked with a pencil the middle of both the front and back, as recommended by my friend Ralf. Also (as recommended by the website gtsix.co.uk) I opened the rail/stringer channels a couple of inches at each end to allow the lining to be pulled taught. Then I took it all to the car and fitted the rail to the three holes either side of the roof.
They needed to be inserted side on and then turned so they arched upwards. I then roughly clipped the windscreen and back window. I'll continue tomorrow.
Saturday 20th June 2020
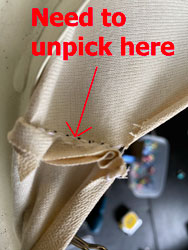
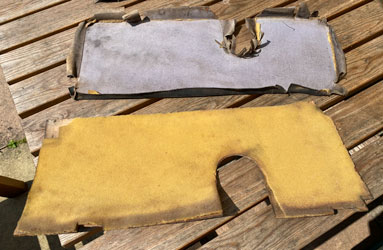
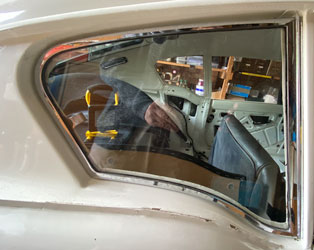
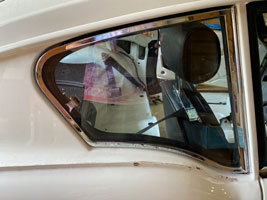
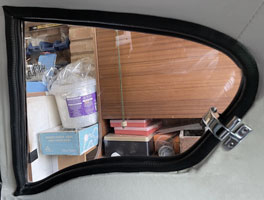
I started clipping the headlining, but straight away encountered a problem with the rear quarter window (the C post), see below. I was not sure whether the material would stretch sufficiently to fit around the curve of the rear of the window aperture. As I see it, no amount of stretching will enable the lower straight section to be long enough to fit.
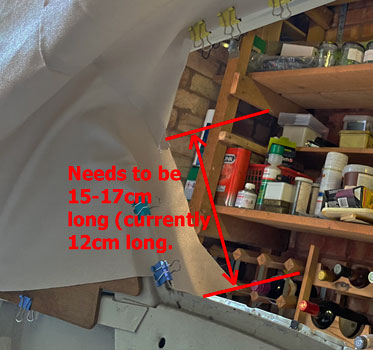
I decided to compare thise section of the new headlining with the old, which fortunately I retained.
As I suspected, the sewn seam is much longer on the new (around 30cm compared to 13cm with the original) and it was designed for the Mk3 as well, which is slightly different. I decided that an unpicking of the seam is necessary to get the length for the rear of the window (which would be reversible).
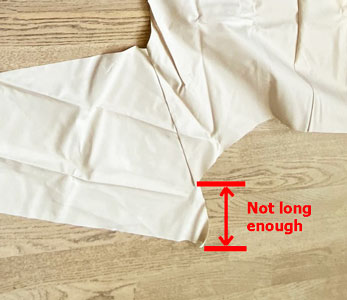
As below, I've calculated that 15 - 17cm is required, so I will unpick 4cm from the seam!

Unpicking started. Theoretically it could be sewn back!
Now it fits much better, although I still need to stretch it a bit further to get more creases out. Now, the top needs unpicking too, to get the seam to around 14cm, like the original headlining.
With hindsight I think I would be better cutting material away, once I've got a rough fit, to get the material to fit properly. The trouble is that I thought the headlining was made to precisely fit my model of GT6 and none of the articles I have read mention modifying the headlining to fit the car. I've learned the hard way that this isn't true!
Monday 22nd June 2020
Just a small amount of progress today. The back isn't fixed anywhere, hence the creases!
Tuesday 23rd June 2020
More progress, now onto the glueing.
The adhesives used are (Dunlop) Thixofix and 3M Super 77. The latter works quite well, but where strength is required I use Thixofix.
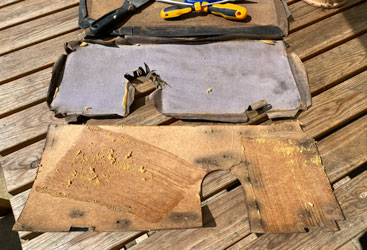
Wednesday 24th June 2020
A bit too hot to work on the car in the garage, so I decided to look for the Rear 1/4 and Wheel Arch Trim Panels. I can't find them in the garage or the house, so I think they may be in the attic. Meanwhile I did find the tailgate trim panels. These were not in good condition but intact so I stripped the black pvc and foam from the boards which were warped from getting wet in the distant past! I decided to try soaking them in water, and drying them with weights on them in the heat of the sunshine. If I can get them flat I've got plenty of foam and black pvc to recover them. If this doesn't work it should not be difficult to make new ones. I've no idea how they are supposed to be fixed, I remember that orginally they were just pushed into position. I'll have to think of something better - perhaps with concealed magnets (I've got a load of button magnets).
One can see the glue brush strokes of their manufacture, back in 1970!
Thursday 25th June 2020
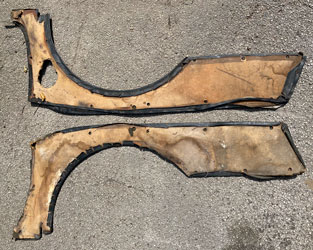
I found the rear quarter & wheel arch trim panels, and they were not in a good way, so I'll order some new ones.
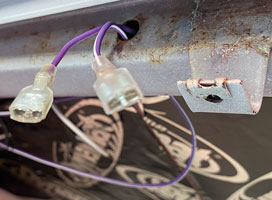
One concern were the wires to the interior light fouling the headlining, but I found a useful hole that I had missed before.
This afternoon we were expecting guests (in the garden) but they didn't come as their car was off the road (not a good advert for recent VW Polos) so I decided to finish the headllining. The B pillars were first covered in foam, an idea I pinched from Jeff Watson of Grease Monkey Garage (YouTube)! The A pillars will be covered in black PVC, as they were originally.
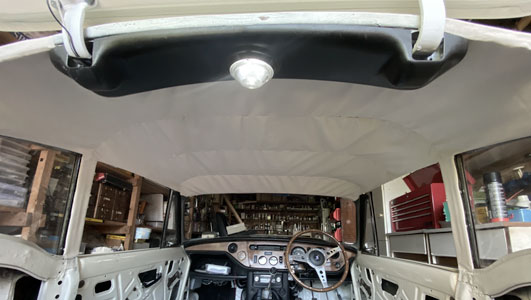
Friday 26th June 2020
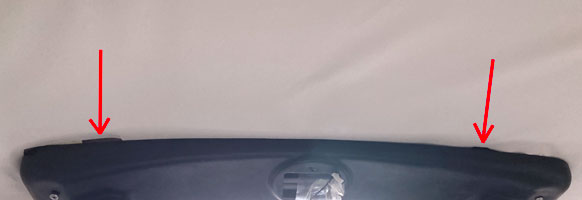
I tried the hair dryer on the headlining and it had no effect whatsoever! After some correspondence with Ralf I've decided to try to tighten up the wrinkles of the headlining. This means removing it from the windscreen and sides which I did this afternoon. One further problem is that one of the areas in front of the tailgate hinge cover is affected by the replacement of the normal tailgate switch (which was unobtainable) with a door switch, which works really well but protrudes more into the roof space. I'll have to look at that, perhaps I can cut some more of the headlining away underneath the hinge cover.
Monday 29th June 2020
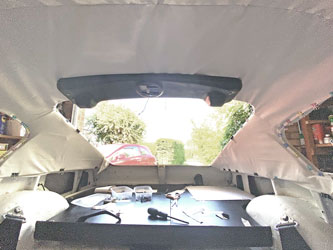
I've made a big effort to improve the headlining, but I'm still not satisfied. Below is my first attempt on Saturday, which is definitely an improvement.
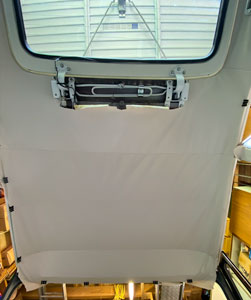
This afternoon I made another effort to remove creases. However when I put the hinge cover back on, gaps showed in the front so I'll have to try to pull the headlining back towards the rear.
Tuesday 30th June 2020
I removed the cover and, releasing any clips at the front, I pulled back the back of the headlining and glued it securely where the hinge cover goes with Thixofix. Hopefully by tomorrow I will be able to stretch it towards the front again. Replacing the hinge cover it looks better, with just one crease to the right (of the picture below) requiring attention.
Wednesday 1st July 2020
Just about ready for glueing, when I'll try to tighten it a bit further!
Monday 13th July 2020
This past couple of weeks I've been very busy with family affairs, but this afternoon I did the final glueing of the headlining - I'm so glad is finished!!

Tuesday 14th July 2020
Found the holes for the visors (having made a cardboard template) and fitted the visors and rear-view mirror.
The left hand visor bar is clearly bent!
Wednesday 15th July 2020
After receiving an email from Ralf informing me of the availability of the correct sunvisors from Aldridge Trimming, I ordered a pair as my existing ones were a bit dirty (although cleaned up) and the passenger mirror was losing its silver. I also ordered a new pair of sunvisor bars (hopefully straight) and a new dipping mirror from James Paddock. The sunvisors came very quickly!
My only concern is the bars which engage with the rubber retainers are a little shorter (see above). I'll have to see if they can be replaced with the originals.
Another thing I need is the black vinyl pieces between the windscreen and the door (620191/620201 Finisher Trim Windscreen Frame Bottom). The old one is pictured below:
These are unobtainable. I tried to find some black vinyl thin enough to go around the door and windscreen frames, and ended up buying a roll from the Vinyl Depot.
Saturday 18th July 2020
The vinyl arrived today.
I think it is a reasonable match with the (albeit dirty) original.
First I attempted to cut a piece of black PVC to fit the inside A pillar (below).
Then I made a paper template, and cut out some vinyl.
However on offering this up to the A pillar it was too small! Instead of cutting a new piece I did some other jobs, fitting the new sun visors and mirror.
The sun visors are a perfect match with the new headlining material.
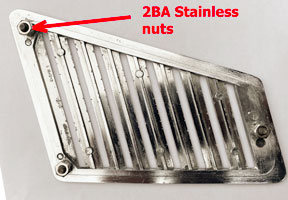
I then finished refurbishing one of the seat runners (LH or passenger side). They are from a Spitfire 1500, to take the Spitfire 1500 seats I've got. The striker mechanism at the rear has new stainless steel setscrews and washers (2BA).
I'll tackle the vinyl again next time!
Monday 20th July 2020
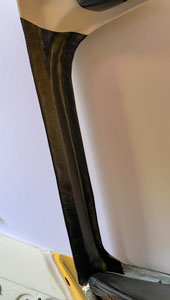
This time my attempts at covering the A pillar were more successful. The first attempt was not good, as the PVC would not adhere to the contours of the top of the A pillar without creasing. The solution, I found was to do it in strips about 1 cm wide at the top. The joins were invisible and after 2 or 3 strips the PVC covered well.
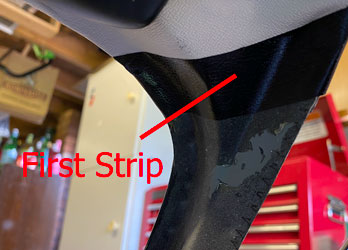
The results can be seen below. Note - some will be covered by door and windscreen seals, hence the need to do the job at this stage.
Tuesday 20th July 2020
I redid the roof lining material on the B posts, as with the padding which I thought was a good idea didn't work as putting on the door seal caused the material to ruck up. With this padding removed the rucking shoule be avoided. I then put some of the black PVC on the middle of the B posts, as a trial fit of the rear wheel arch trim panels left a small area uncovered (shown by arrow). Plainly repairs over time has left the dimensions of the rear side of the car to become different from original. I then fitted the RH door seal. It is one of a pair I bought from East Kent Trim Supplies, with a right angle.
I also cleaned up the Rear Quarterlight Toggle Assemblies.
Friday 24th July 2020
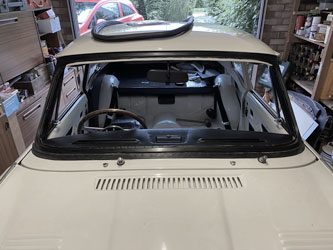
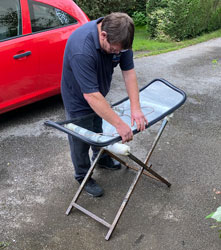
I decided to get an expert to fit the windscreen rather than tackle it myself (having watched videos of it on YouTube). Steve, from the company who did the welding (Southside Classic & Custom) uses a mobile windscreen fitter called Mike (of A & E Windscreens, Ellesmere Port), so I contacted him. He was very willing, we are waiting for a suitable dry day to do the work. I already bought a new rubber from Moss Europe. In preparation I started the car, the first time since May. The operating temperature seemed a bit high (around 85 degrees) but checking a TR6 website it seems it should be around 85 to 93 degrees, so that's fine, particularly in a warm garage (22 degrees).
I continued with the painting of the RH seat runner.
Saturday 25th July 2020
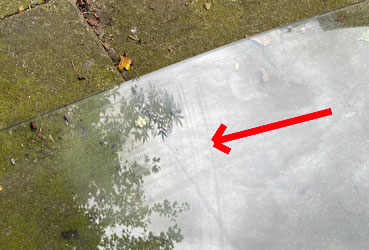
This afternoon Mike arrived and fitted the windscreen for me, and I think he did an excellent job. He was delayed a couple of hours so I while I waited I got out the windscreen which I had cleaned and wrapped in bubble wrap after it was taken out. On closer inspection I noticed a scratch, probably caused by the windscreen wiper. I did try to remove this with application of a mild abrasive (toothpaste!) but this didn't work. A subsequent conversation with Mike elicited that it does work, but takes several hours of rubbing!
Fortunately I had a spare screen which I had been given for nothing around 35-40 years ago. I dug it out and it still had a very perished rubber attached and was filthy! After a comprehensive clean it turned out to be in much better condition than the original. Below is the screen, new rubber and finishing strip, ready for fitment.
Below Mike (and his helper, Mike, also) working on the screen.
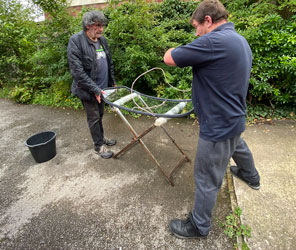
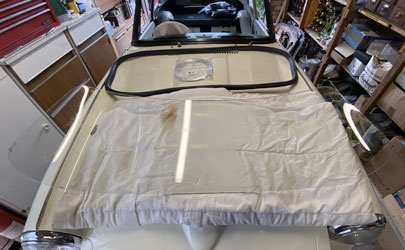
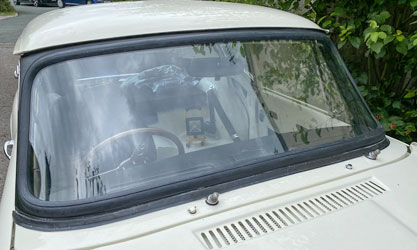
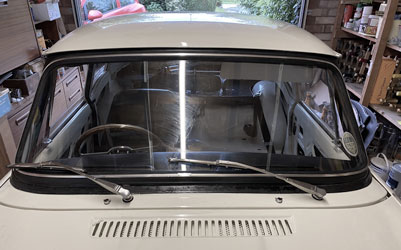
Below, the finished job (except the chrome finishing strip).
Mike said it needed to settle before fitting the chrome finishing strip, so he'll be back next week to fit this, but he did remark on the good quality of the seal (Moss-Europe). He wouldn't accept payment until the job was finished to my satisfaction (£65).
Sunday 26th July 2020
I asembled the striker plate of the seat runner with new stainless steel fasteners:
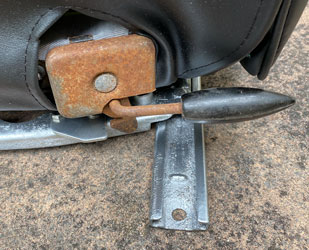
Below the RH (drivers) seat trial fixed to the runner. The striker mechanism was a little rusty and needed cleaning up and painting. It prevents the seat from tipping up, presumably the ability to tip (when the lever is lifted) is needed when the occasional rear seat is fitted and gives access to the rear.
Monday 27th July 2020
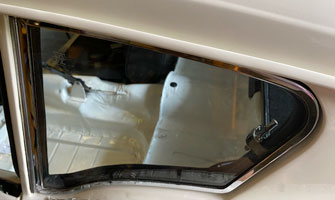
First, I cleaned the chrome of the rear RH quarter window.
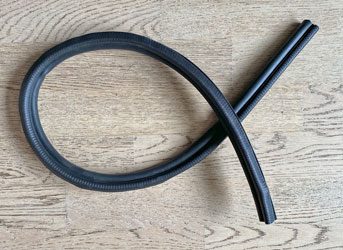
Then I tried fitting the sealing and found I had a problem! Below, on the left is the original and on the right is the replacement from Rimmers (RX3007BLACK) - it is just a length of standard weatherseal.
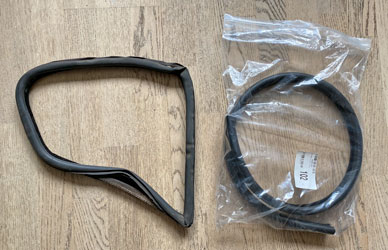
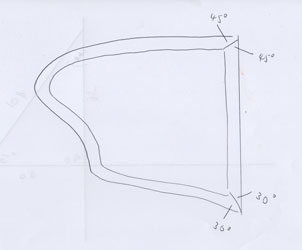
It needs to be cut, mitred in the corners and glued together. I tried mitre cutting a sample but the blade was not up to the job, so I ordered some sharper blades. I don't think glueing is necessary, as when fitted it shouldn't go anywhere. However on reflection, there was some material left over from the door seals. If I use this for the rear quarter windows it will match the doors.
The original has one join at an angle of about 30° at each end, giving a total angle of 60°. However I propose using 2 joins/pieces, one straight piece at the door end with a cut angle of 30° at the bottom and a cut angle of 45° at the top. A longer piece going from the door side to the rear will have a 30° cut at the bottom and a 45° cut at the top, as per my very crude drawing below. By using two pieces I will be able to use the offcuts from the door seal.
Wednesday 29th July 2020
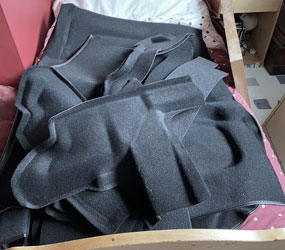
The moulded carpets arrived from Paddocks, they are genuine Newton Commercial ones. I believe these are the best available, as they managed to secure most of the original Spitfire and GT6 moulding tools from Firth Furnishings Ltd who were the original manufacturers. They then made the remaining tools and now manufacture these carpet sets in-house. For now they are on a spare bed (until my wife sees them!)
Friday 31st July 2020
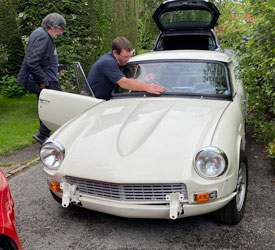
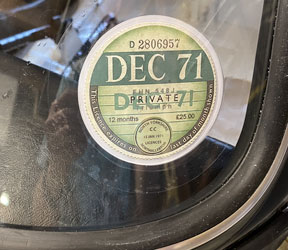
Mike returned today to put the finishing/locking strip in. He had ordered a special tool but it hadn't arrived so he made his own. However he couldn't get this to work so resorted to the tried and tested 'rubber mallet' method. Now completed, I replaced the windscreen wipers and my home-made facsimile of the original tax disc (the car, although made in August 1970, was not registered until the 1st January 1970).
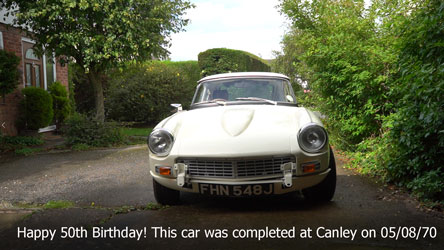
Saturday 1st August 2020
My GT6 was completed at Canley Assembly Hall, Canley Plant, Coventry on 5th August 1970. I therefore intend to drive it on a public road for the first time on 5th August 2020, fifty years to the day after the cars 'birthday'. I am therefore now concentrating on making the car road legal, and fitted carpets are not necessary for that - I can fit them afterwards! I have fitted the driver's seat by first fitting the seat runner using 5/16" rather than the original 1/4" setscrews. Fitting the seat was almost impossible as I couldn't see where the two setscrews and nuts fitted, I could feel where the setscrews went, but couldn't get the nuts to start. In desperation I removed the seat base which came off quite easily unlike the original seat.
The seat belts look great - note how well the Aluminium Alloy seat belt guide tidy works.
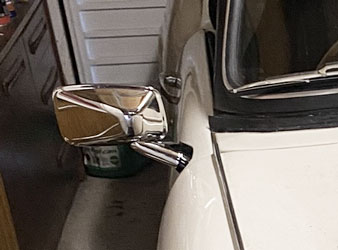
Next I fitted the driver's side door mirror - it is a legal requirement that at least 2 mirrors are working. These TEX (allegedly the original manufacturer) mirrors look amazing quality, but turned out to be hard to fit securely as they use screws which are supposed to enlarge plastic pegs which sit in 7mm holes in the door. In practise they are not terribly tight and could come out when driven on the road. Yes, I checked the hole didn't deviate from the specified 7mm! I think I will subsitute countersunk screws and nuts as the inner side is easily accessible and then they would be much more secure.
Sunday 2nd August 2020
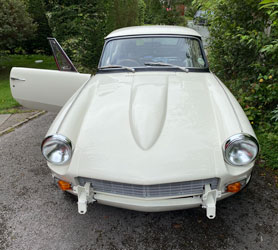
I posted this on Instagram and received many likes!
Tuesday 4th August 2020
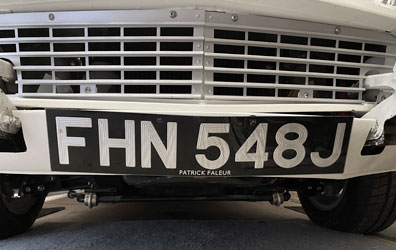
Today I finally fitted the front numberplate (to comply with GB regulations), which turned out to be quite a tricky job as it entailed removing the front valance. This was difficult because accessing the nuts and bolts (see below) under the support brackets was almost impossible!
It was secured by some stainless steel fasteners, sprayed black.
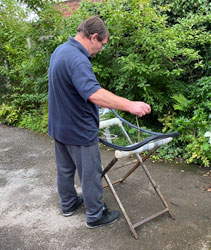
Next, I made a jig to cut the window weatherseal at 30°.
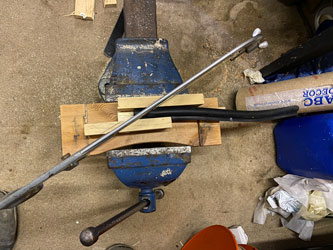
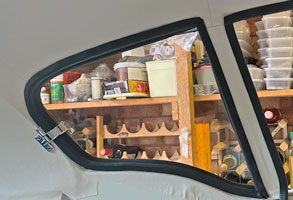
Cutting it is also challenging, as the metal inside is extremely hard (spring steel?). I had to use a larger hacksaw, and try different blades before achieving a result. The first shorter part of the RH rear quarter window seal is now in place.
Wednesday 5th August 2020
To watch the video of my car's first venture onto public roads for around 20 years click here.
Unfortunately there was a noise coming from the rear O/S wheel which I'll have to investigate, so I turned back home after 100 metres! I'm hoping that it is just the brake drum but I can't drive again until I have investigated and fixed this problem. Also the steering was really heavy, even at 20/30 mph. This may be the combination of low tyre pressures and the tracking being all wrong. Today I was a little preoccupied with another car. My Vauxhall Corsa (often seen in the background) will have to be scrapped as it failed its MoT and to sort it would cost around £1800 when the car's only worth approximately £600. This weekend I will be looking at some electric cars (BEVs). My favourites are the Honda e and the BMW i3.
Thursday 13th August 2020
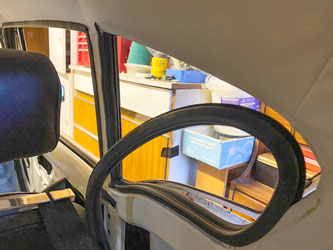
I've been very busy, but in a spare hour I finished cutting and fitting the weatherseal for the RH rear quarter window. I was then able to refit the cleaned up catch.
Friday 14th August 2020
I did the same to the LH.
Note the seals match!
Sunday 11th October 2020
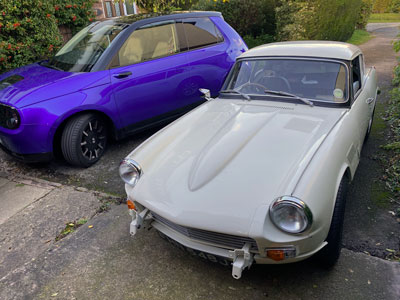
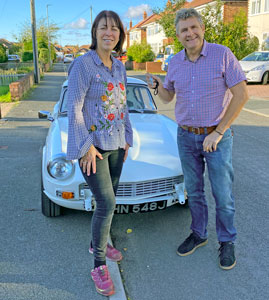
After removing the rear o/s wheel to try to find out what the noise was (last time I took the car on the road it went du du du) I couldn't find anything! Therefore as today was nice and sunny I decided to give the car a longer drive. Driving "around the block" twice the noise seems to have disappeared, although the car was certainly not quiet - creaks and groans were very apparent all over the place. I pumped the tyres up to 30psi (2 bar) and at speed the steering is quite light, and also very imprecise. For a reconditioned rack this surprised me, hopefully it is caused by the front tracking being way out. I then went to the local garage to put some more petrol into it, then called at my friends Garry & Yvonne. Below is the car with my new EV, and with my friends outside their house.
I phoned "Alex" of Michael Alexander in Saltney, Chester yesterday about taking the car to his garage in Saltney for a general check - he specialises in Triumphs (Stag, GT6, TR and Spitfire) so hopefully he will be familiar with the marque. He asked for me to do him a list. I'll do this and phone him next week to book it in. First I need to fit the passenger seat!
Tuesday 24th November 2020
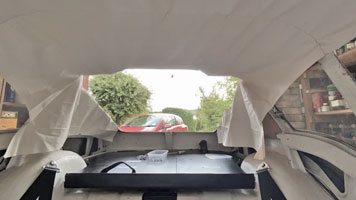
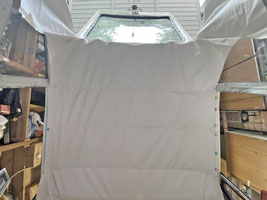
With lockdowns in first, Wales and then England I never got around to taking the car to the Triumph specialist. As it was a dry day, I started the car and drove it 'around the block' to warm it up. I noticed that the speedometer was wildly inaccurate and not very stable, I'm not sure what the answer is to this, but I can fit my satnav which indicates the true speed. Back in the garage I wrapped it up in its winter coat.
Added on Sunday 29th November 2020: Recently the weather has been sufficiently cold for the appearance of salt on the road, so the outing above will be the last for 2020. In 2021 when my Dad's affairs have been finally sorted I will finish the car, get it checked out by Michael Alexander, and embark on some longer journeys (first to Dad's house in Ruthin). Apart from some minor fettling the main job will be fitting the moulded carpets and stripping out and refurbishing the door mechanisms.
Best wishes for the New Year to all who read this, Patrick.

![]()